YOU WILL LEARN
✓
Make a data type for anything with its own shape
✓
Add fields to a page for each item
✓
Fill them in, and one design shows every tour
Every tour has a price, a guide and a list of days. Instead of building each page by hand, you can give tours their own fields. Then one design shows them all, and a new tour is just a new item to fill in.
In the screenshots, Himalaya Sangha Journeys, a small travel company, sets up a page for its tours.
Describe one day
An itinerary is made of days, and each day has a title and a plan. That is a shape of your own, called a data type. Data types need the Pro plan.
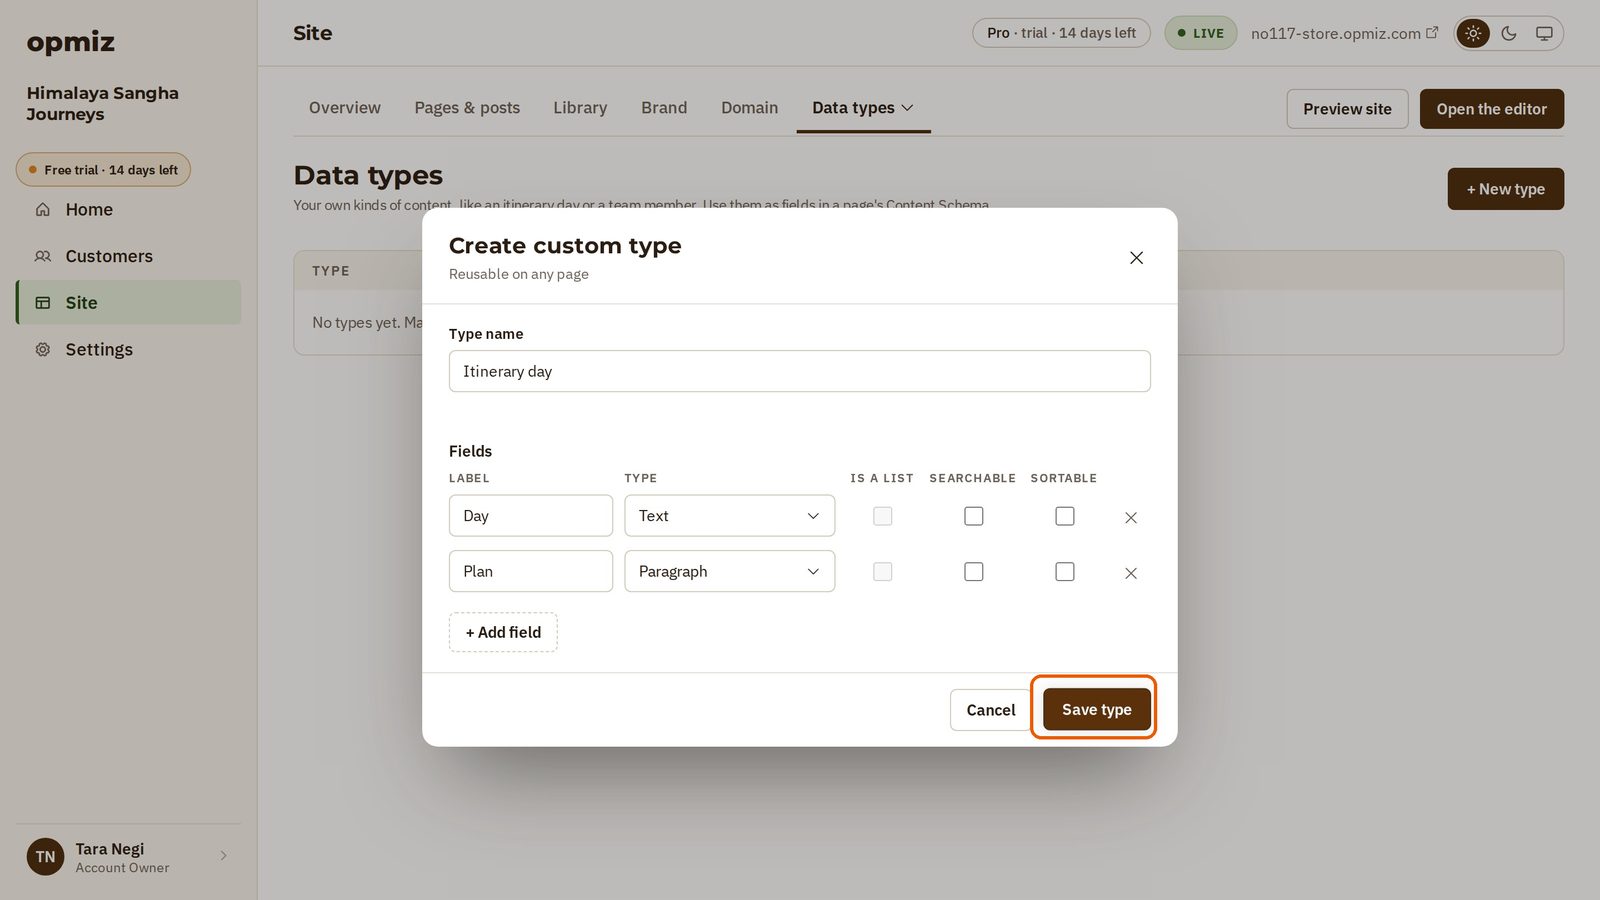
- In Site, open Data types (it is under More) and press + New type.
- Call it Itinerary day.
- Add one field for the day and one for the plan. In the video, Day is a Text field and Plan is a Paragraph.
- Press Save type.
A page for each tour
- In Site, press + Add page.
- Choose Page for each item. It is one design that every tour uses, with each tour at its own address.
- Choose Another list, press Continue, and name it Tour. Then press Create page.
The fields every tour has
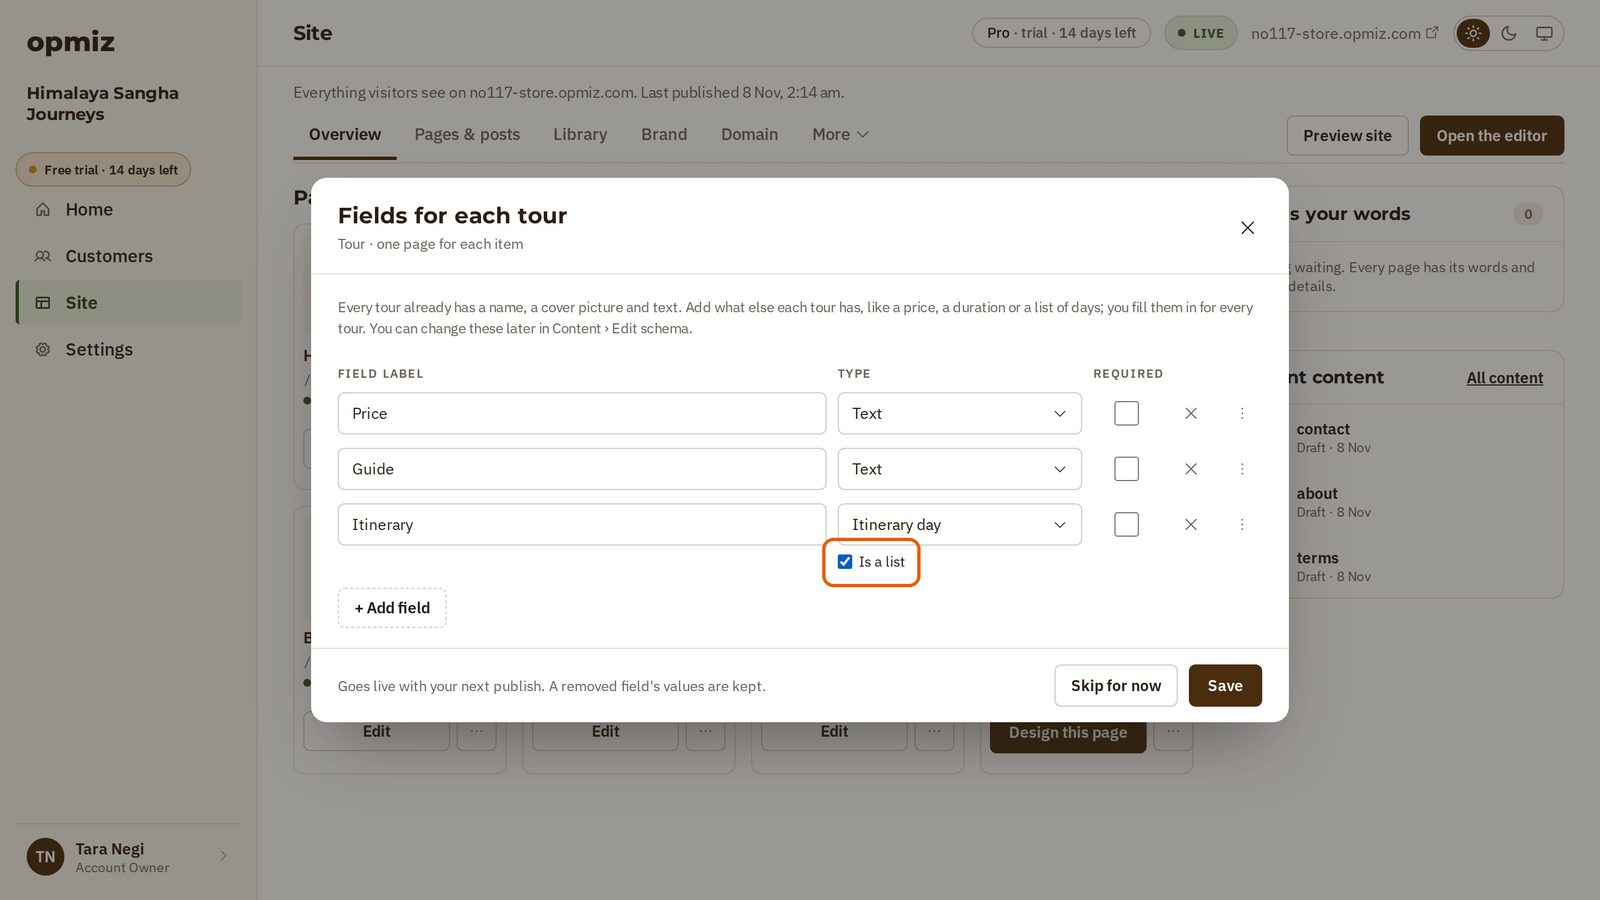
Each tour already has a name, a cover picture and text. In Fields for each tour, add what else it needs.
- Press + Add field and add Price and Guide. Both are Text.
- Add Itinerary, and for its type choose the Itinerary day type you just made.
- Tick Is a list, because a tour has as many days as it needs.
- Press Save.
Fill in your first tour
- Press Create the first tour, give it a name, and press Save. The tour opens.
- Fill in the short description and the text.
- Your own fields are below, under Tour details, each with an Edit button. Press Edit next to Price, type the price and save. Do the same for Guide.
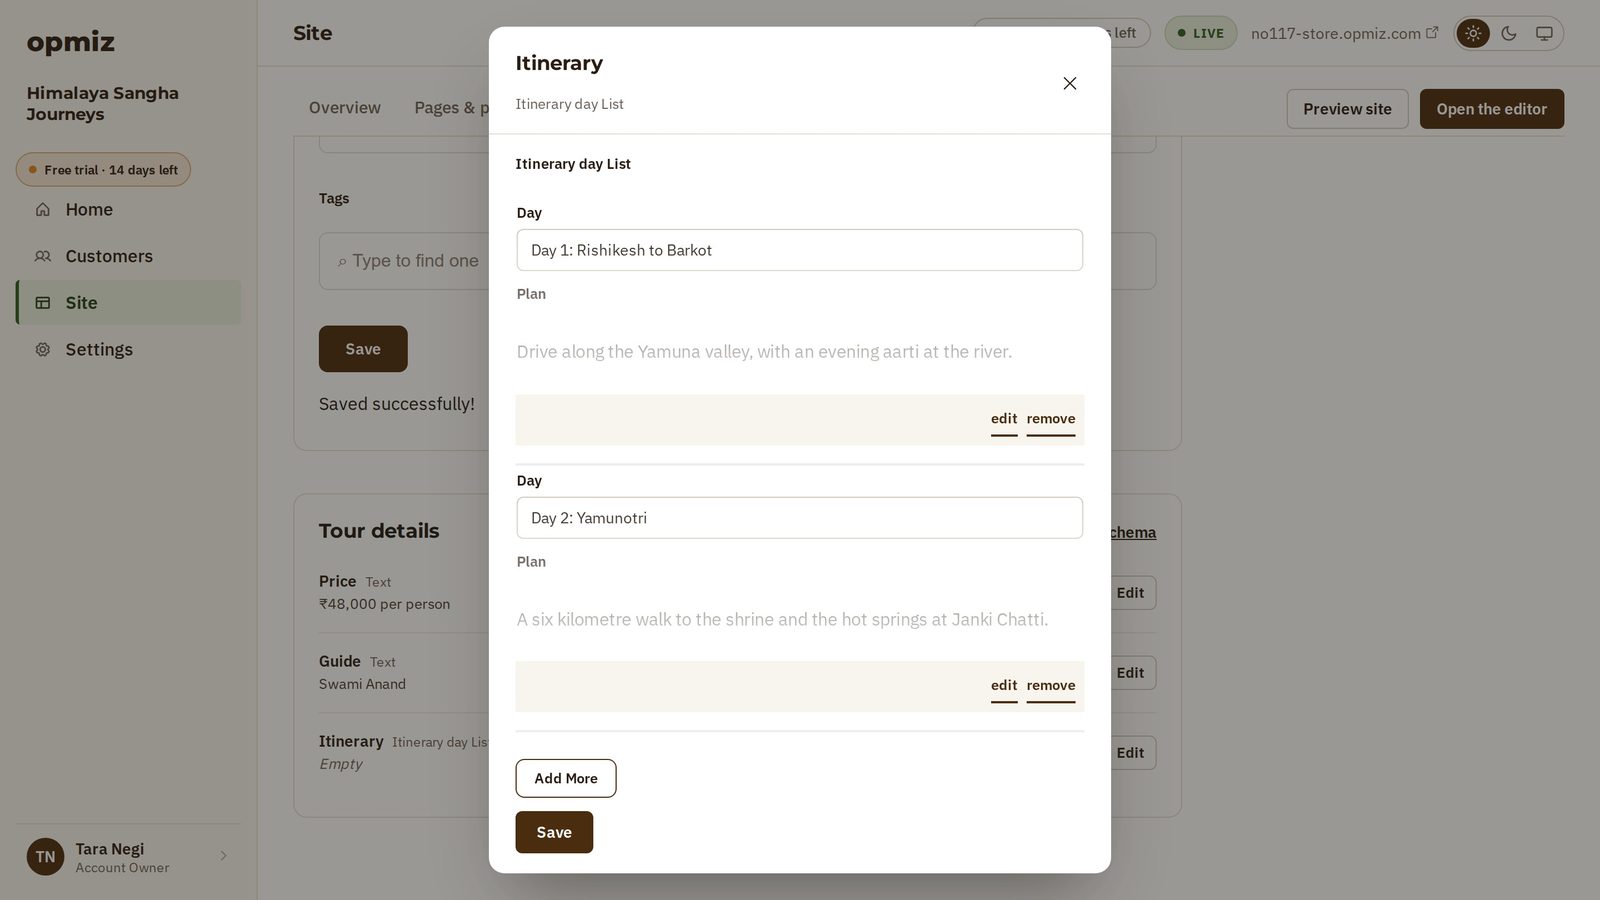
- Press Edit next to Itinerary and add each day with its plan. Use Add More for the next day, then press Save.
- Press Publish, so the tour is ready for your site.
Show the fields on the page
The Tour page still needs its design.
- Go back to the Tour list and press Design the page. The editor opens with your real tour in it.
- To put the price beside the name, select the heading and press Edit.
- The heading is not fixed text. It is a field, so it changes with each tour. Type @ where you want the price, and your tour's fields appear. Choose Price.
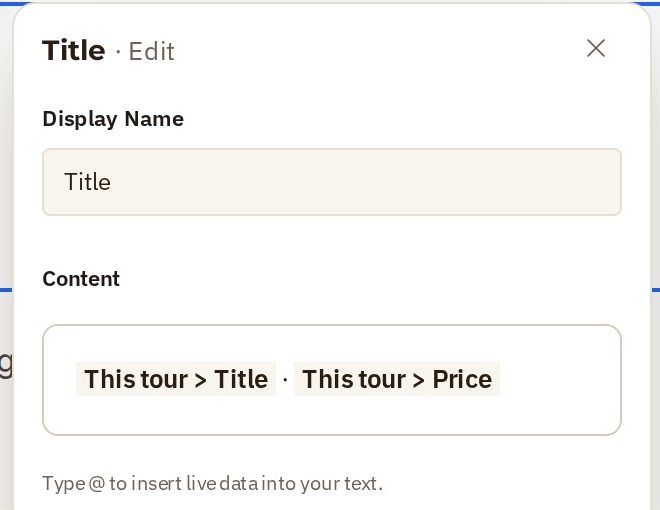
The heading now shows the tour's own price. Every tour will show its own, from the same design.
- Publish the design, once: press Publish at the top right of the editor, then confirm.
See it as a visitor
Open the tour on your site. It is at its own address. Its name, its price and its text come from what you filled in.
For the days, the video added one more thing to this design beforehand: a list that repeats for each day. That is why each tour shows its own days. The video does not show how to add that list.
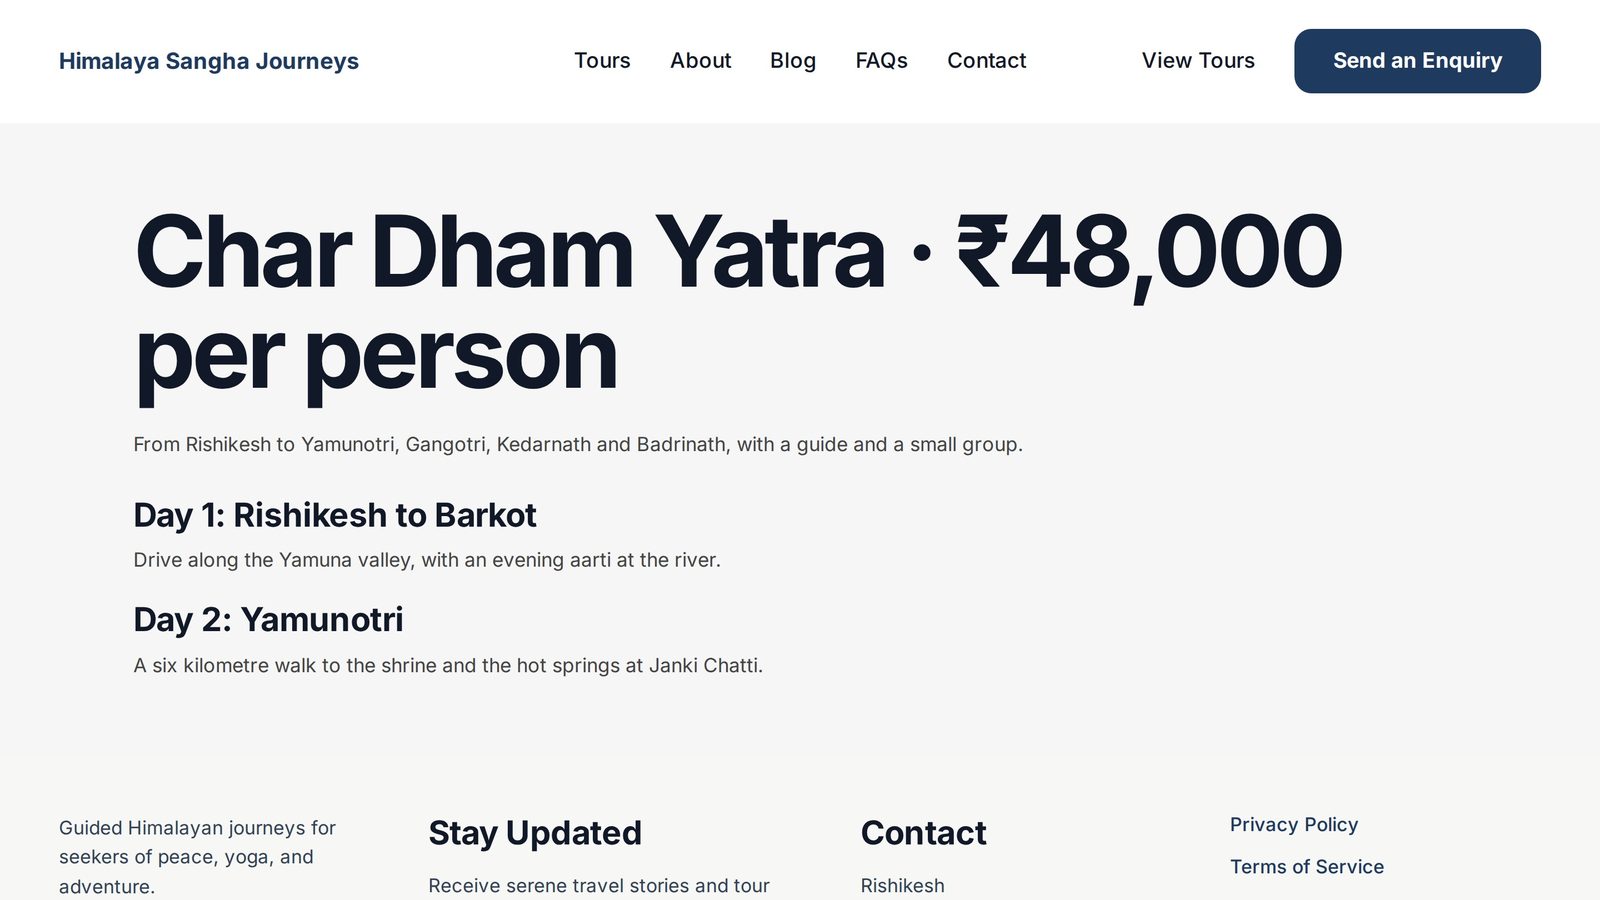
From here, a new tour is just a new item: fill in its fields and press Publish. The design takes care of the rest.
Was this tutorial helpful?
‹ Previous
Write and publish a blog postIN THIS TUTORIAL
AI websites with native commerce. Pages, blog, store, payments and GST invoices in one place, built from a short description.
Start free for 14 days →© 2026 Opmiz · WriterBabu Online Services Private Limited. All rights reserved.
Prices in INR, before 18% GST · Made in Patna, India