YOU WILL LEARN
✓
Make the page and its design once
✓
Write in Site, under Content
✓
Publish a post, and it is live at its own address
A site that never changes gives people little reason to come back. A blog fixes that. You set the blog up once, and after that every new post is a title, some text and one press of Publish.
In the screenshots, Petal Street, a flower studio in Pune, adds a blog and publishes its first post.
Make a place for your posts
If your site has no blog yet, you make one here, once.
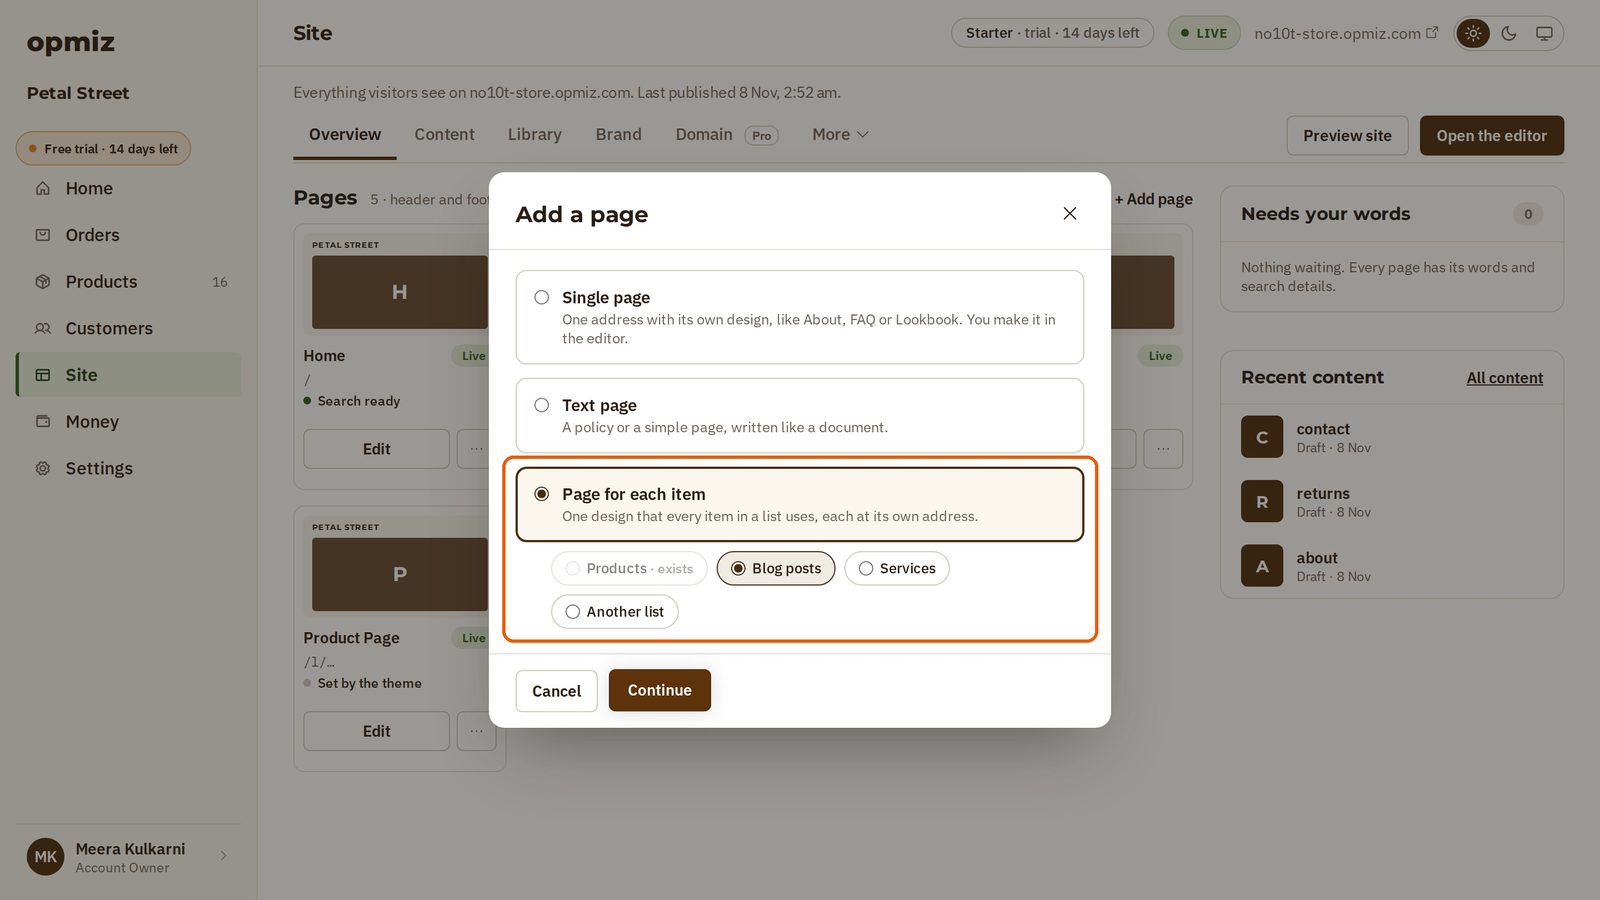
- Open Site in the menu on the left and press + Add page.
- Choose Page for each item. A blog is one design that every post shares, with each post at its own address.
- Choose Blog posts, then press Continue.
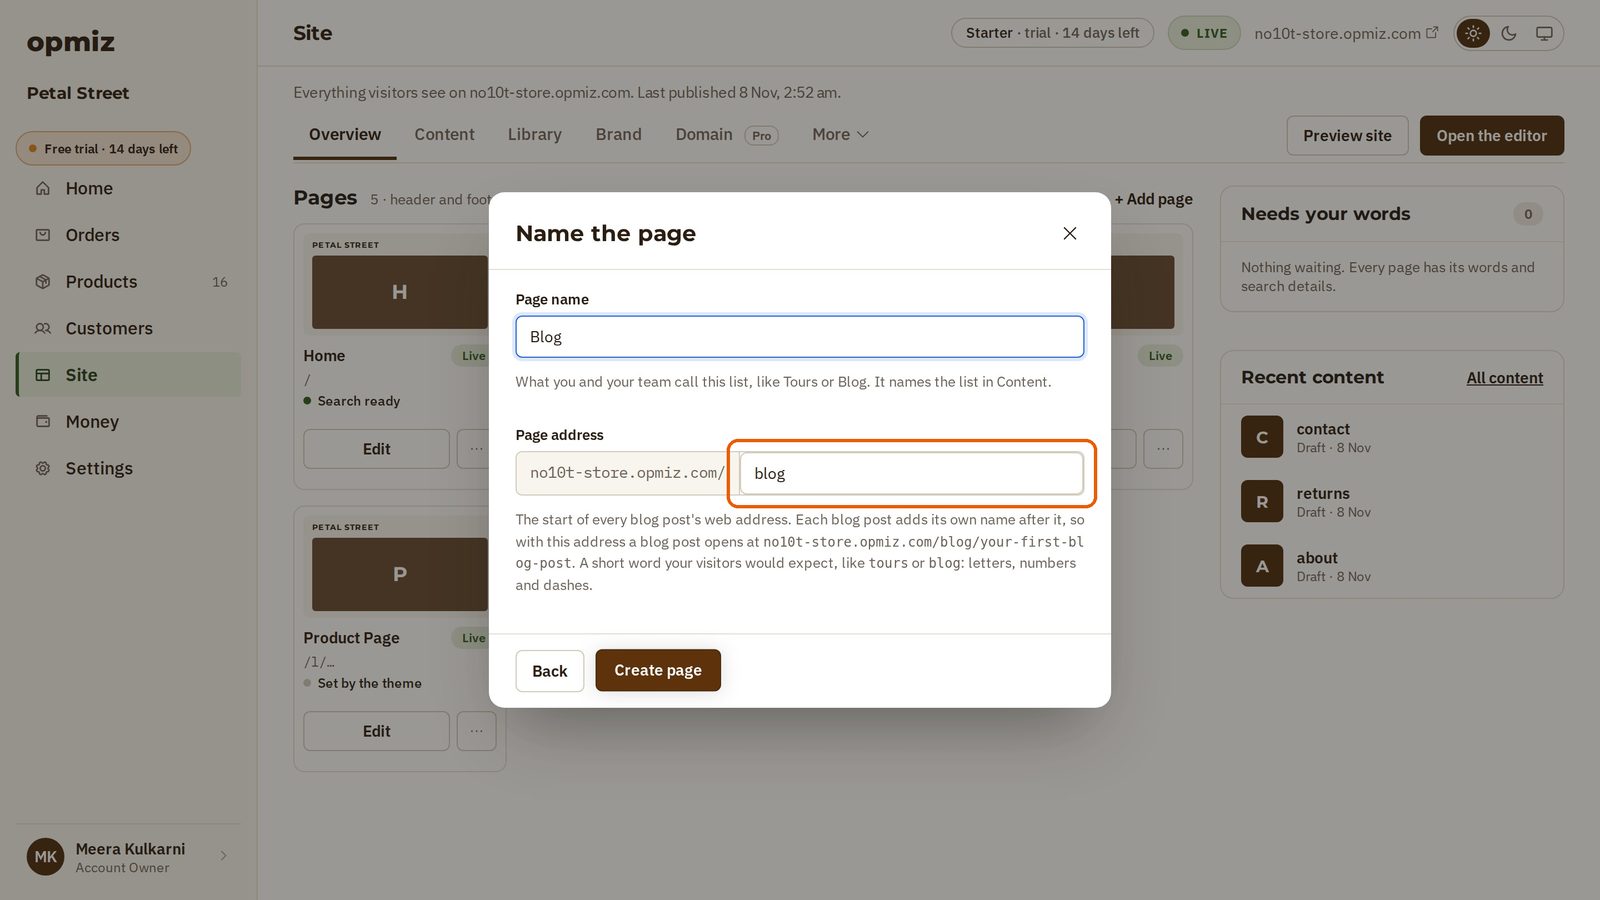
- Opmiz fills in the Page name and the Page address for you. Each post's address will start with /blog. Press Create page.
- Opmiz asks about Fields for each blog post. Every post already has a title, a picture and text. That is all a blog needs, so press Skip for now.
- In the Blog is ready box, press Create the first blog post.
Write your post
- Give the post a Name that says what the reader will learn, and press Save. The post opens.
- Fill in the Short description. This is what search engines can show under your title.
- Write your post in Body. Write it the way you'd explain it to a customer.
- Save your work.
Publish it
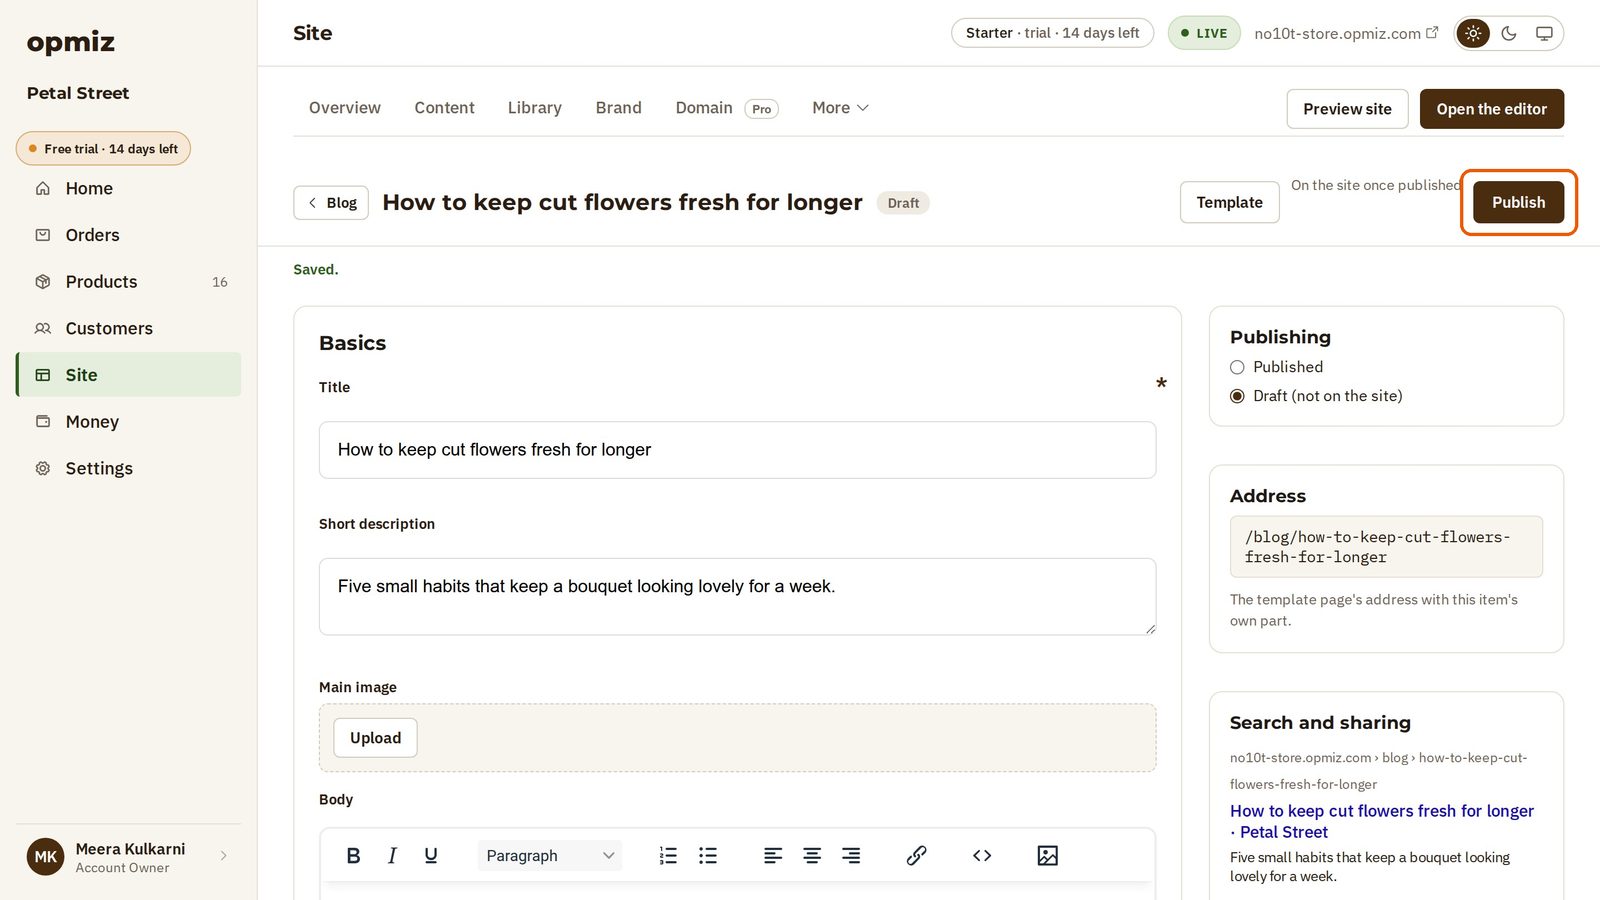
So far the post is a draft, marked Draft next to its title. Nobody else can see it.
Press Publish at the top right, and the post is ready for your site.
Choose how posts look, once
The blog itself still needs a design.
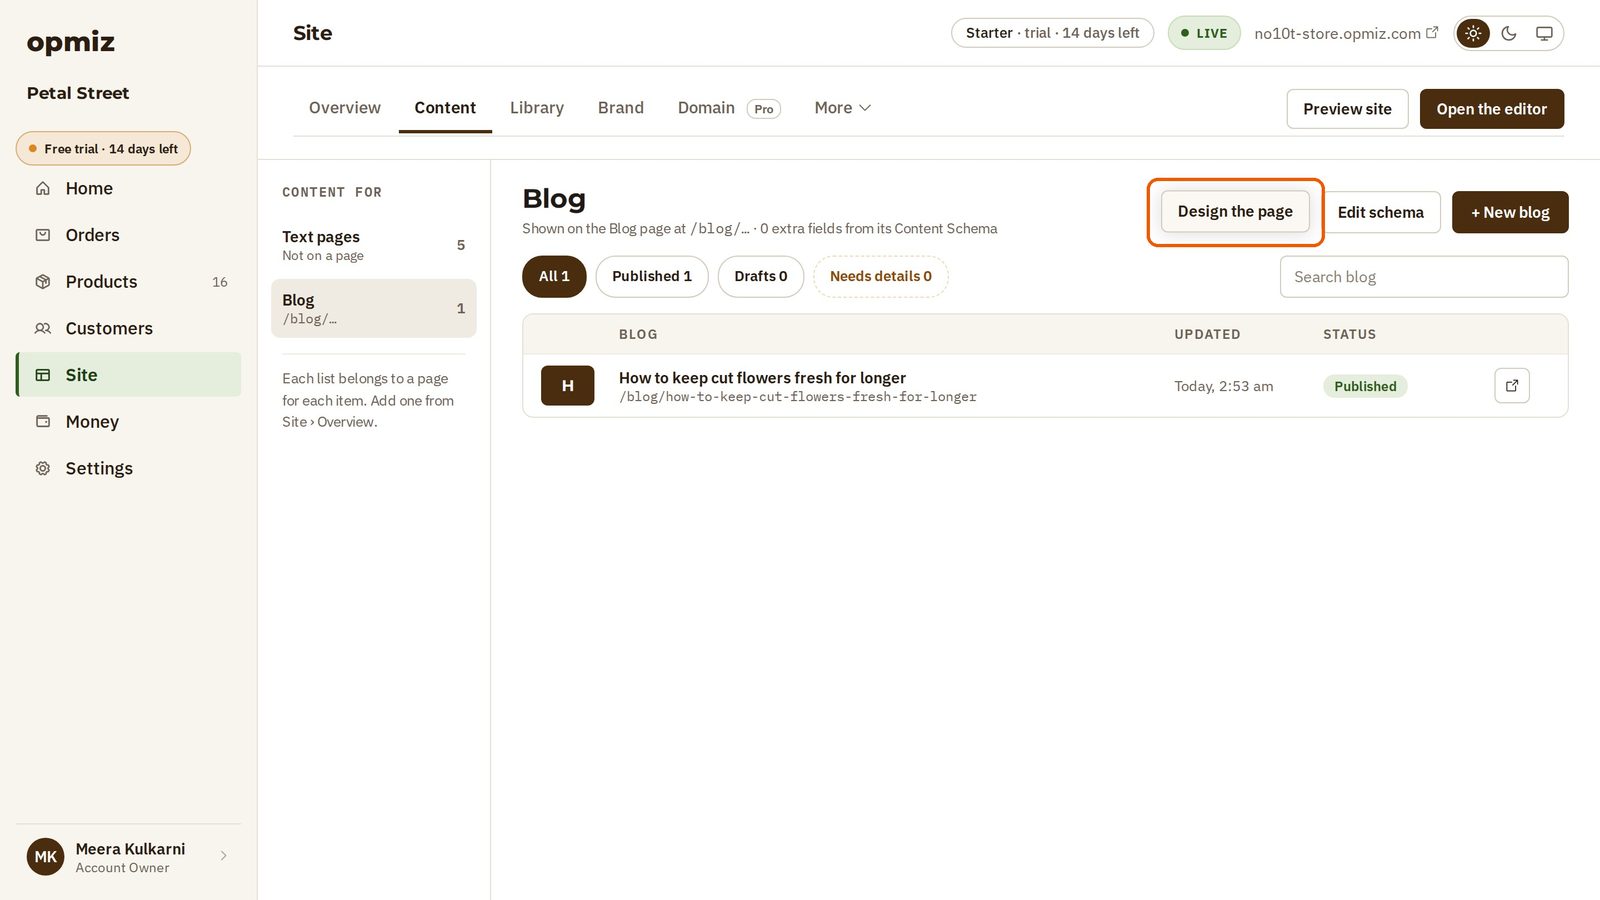
- Press Blog at the top left of the post to go back to your Blog list.
- Press Design the page.
- Opmiz starts you with your title and text, in your site's style, showing your real post. You can change it here, like any other page.
- When you're happy, press Publish at the top right of the editor, then Publish changes.
You do this once, not for every post.
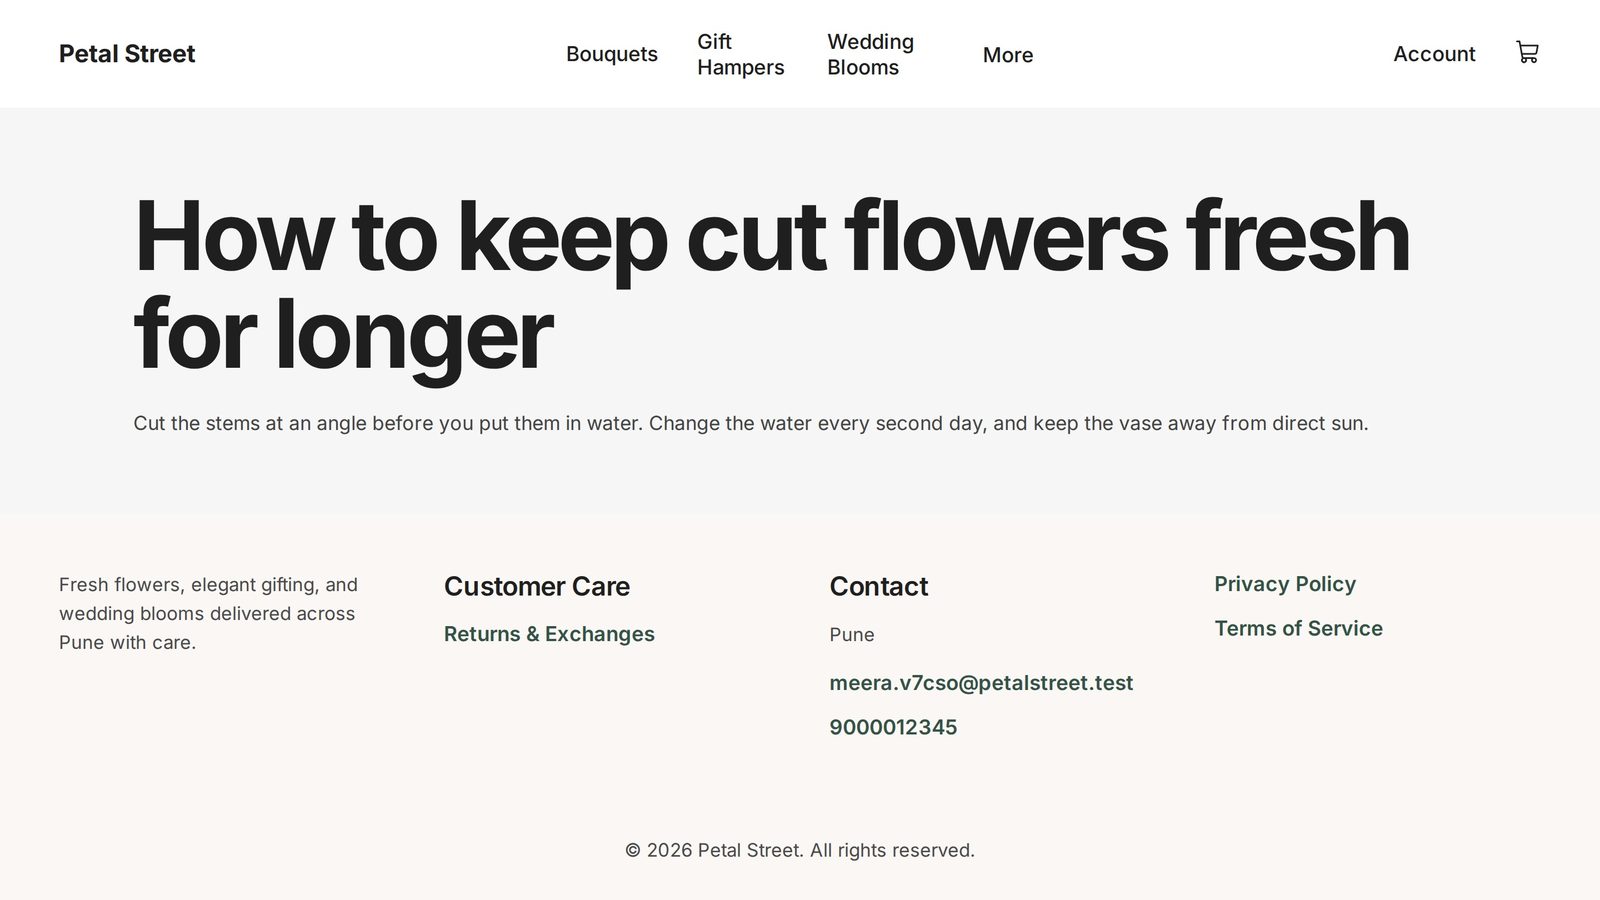
Read it as a visitor
Open the post on your site. It is there at its own address. Copy the address and share it wherever your customers are.
Your next post
From now on it is simpler.
- In Site, under Content, open Blog and press + New blog.
- Give it a name, save, and write your text.
- Save, and press Publish.
The post is live straight away, in the same design. There is no need to publish the whole site.
A short post each month gives people a reason to come back, and something new to share.
Was this tutorial helpful?
IN THIS TUTORIAL
AI websites with native commerce. Pages, blog, store, payments and GST invoices in one place, built from a short description.
Start free for 14 days →© 2026 Opmiz · WriterBabu Online Services Private Limited. All rights reserved.
Prices in INR, before 18% GST · Made in Patna, India