YOU WILL LEARN
✓
Legal name and address in Business details
✓
GST number and numbering in Tax and invoices
✓
A GST rate on each product
An invoice is a legal document, so it has to be right. Set up your details once, and Opmiz fills in every invoice for you. At the end, each order gets its own invoice with your legal details and the GST worked out for you.
In the screenshots, Meera sets up invoices for Petal Street, a flower studio in Pune.
Your legal details
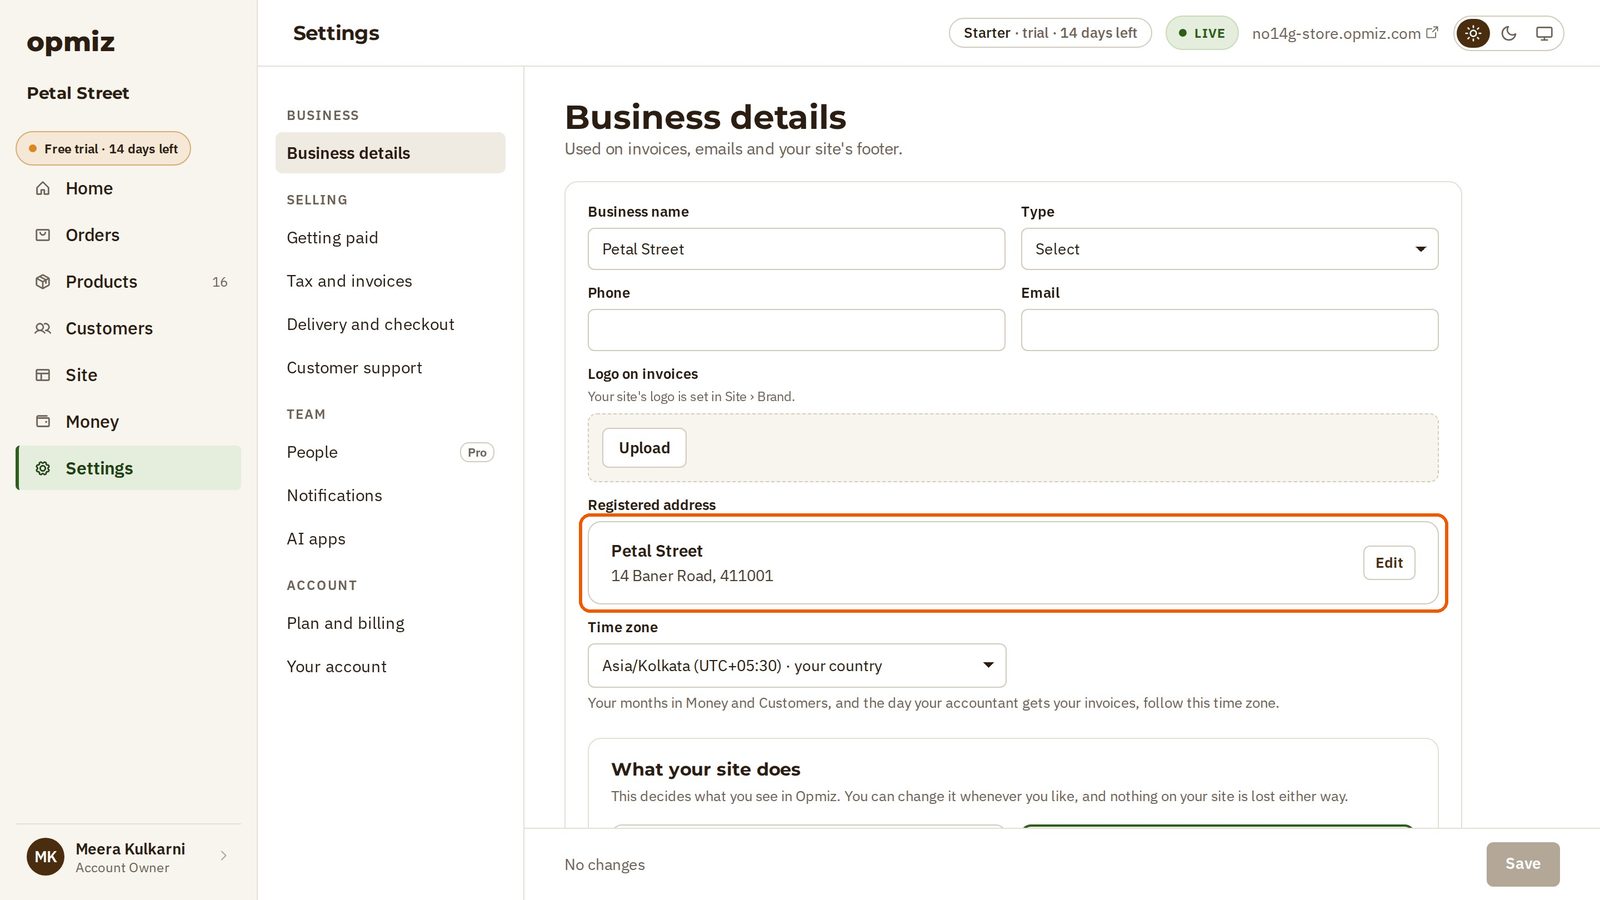
Open Settings, then Business details. As the page says, these details are used on invoices, emails and your site's footer.
- Business name: use the name your business is registered under.
- Registered address: your registered address. If you have already published your store, you gave it then. This is where you change it, with Edit.
Your GST number
- Open Tax and invoices.
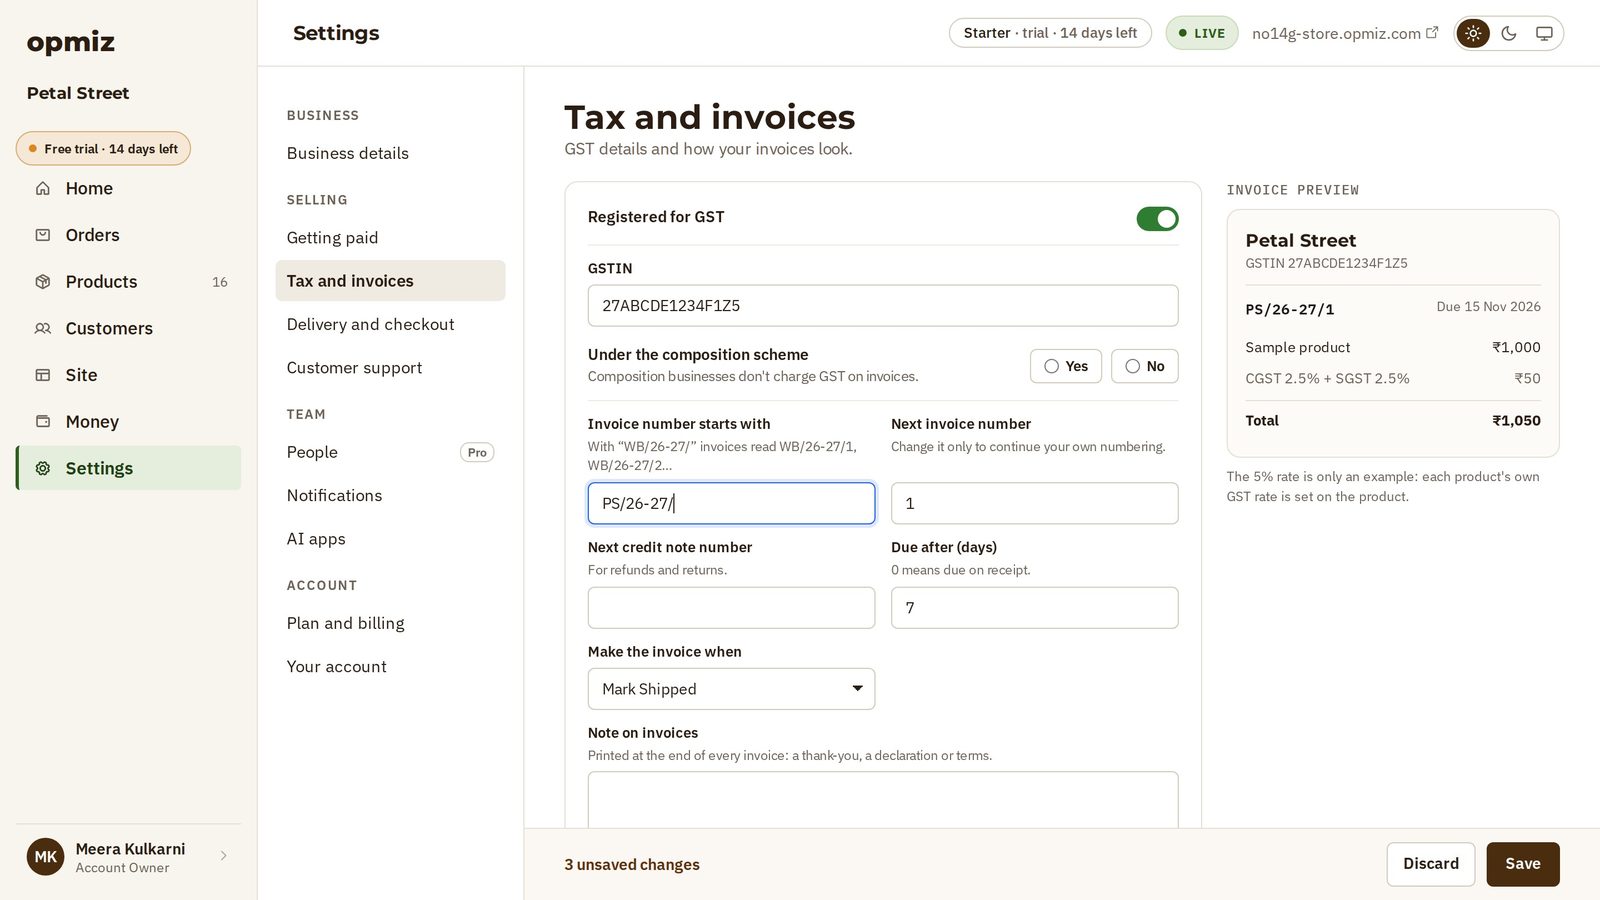
- First, Registered for GST: if you are not registered, choose No. Meera is registered, so she chooses Yes.
- A GSTIN box appears. Type your GST number. The one in the video is a made-up sample.
Watch the Invoice preview on the right. It shows your invoice as you fill this in, with your GST number and the tax on a sample product.
Your invoice numbers
- Invoice number starts with: many businesses use their initials and the financial year. Meera types PS/26-27/, so her invoices read PS/26-27/1, PS/26-27/2 and so on.
- Make the invoice when: choose the moment Opmiz makes the invoice. Meera chooses Mark Shipped, so the invoice is made when an order is marked shipped.
- Below this there is room for a note, your bank details and a signature.
- Press Save when you are done.
Each product's GST rate
The GST rate belongs to each product, because different products can have different rates. The rate in the invoice preview is only an example.
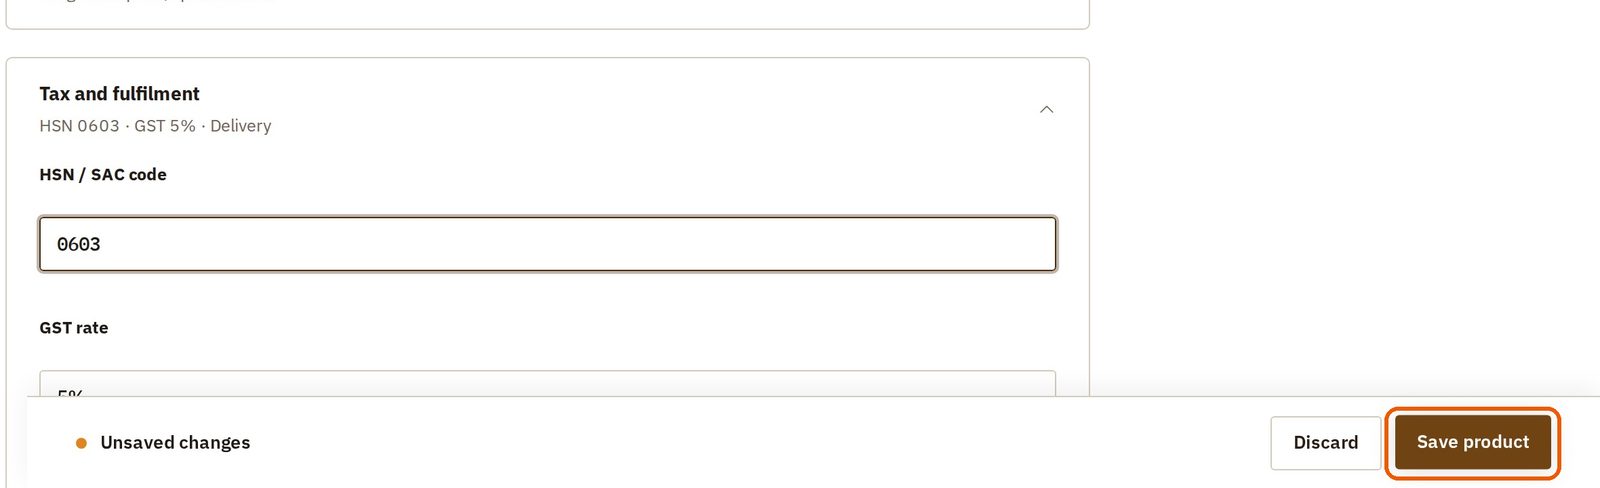
- Open a product's page and open Tax and fulfilment.
- Enter its HSN / SAC code and its GST rate. Your accountant can tell you the right ones for what you sell.
- Press Save product.
See a real invoice
In the video, a customer, Aarav, orders the bouquet Meera just set up.
- In Orders, open the order.
- When it is packed, press Mark packed.
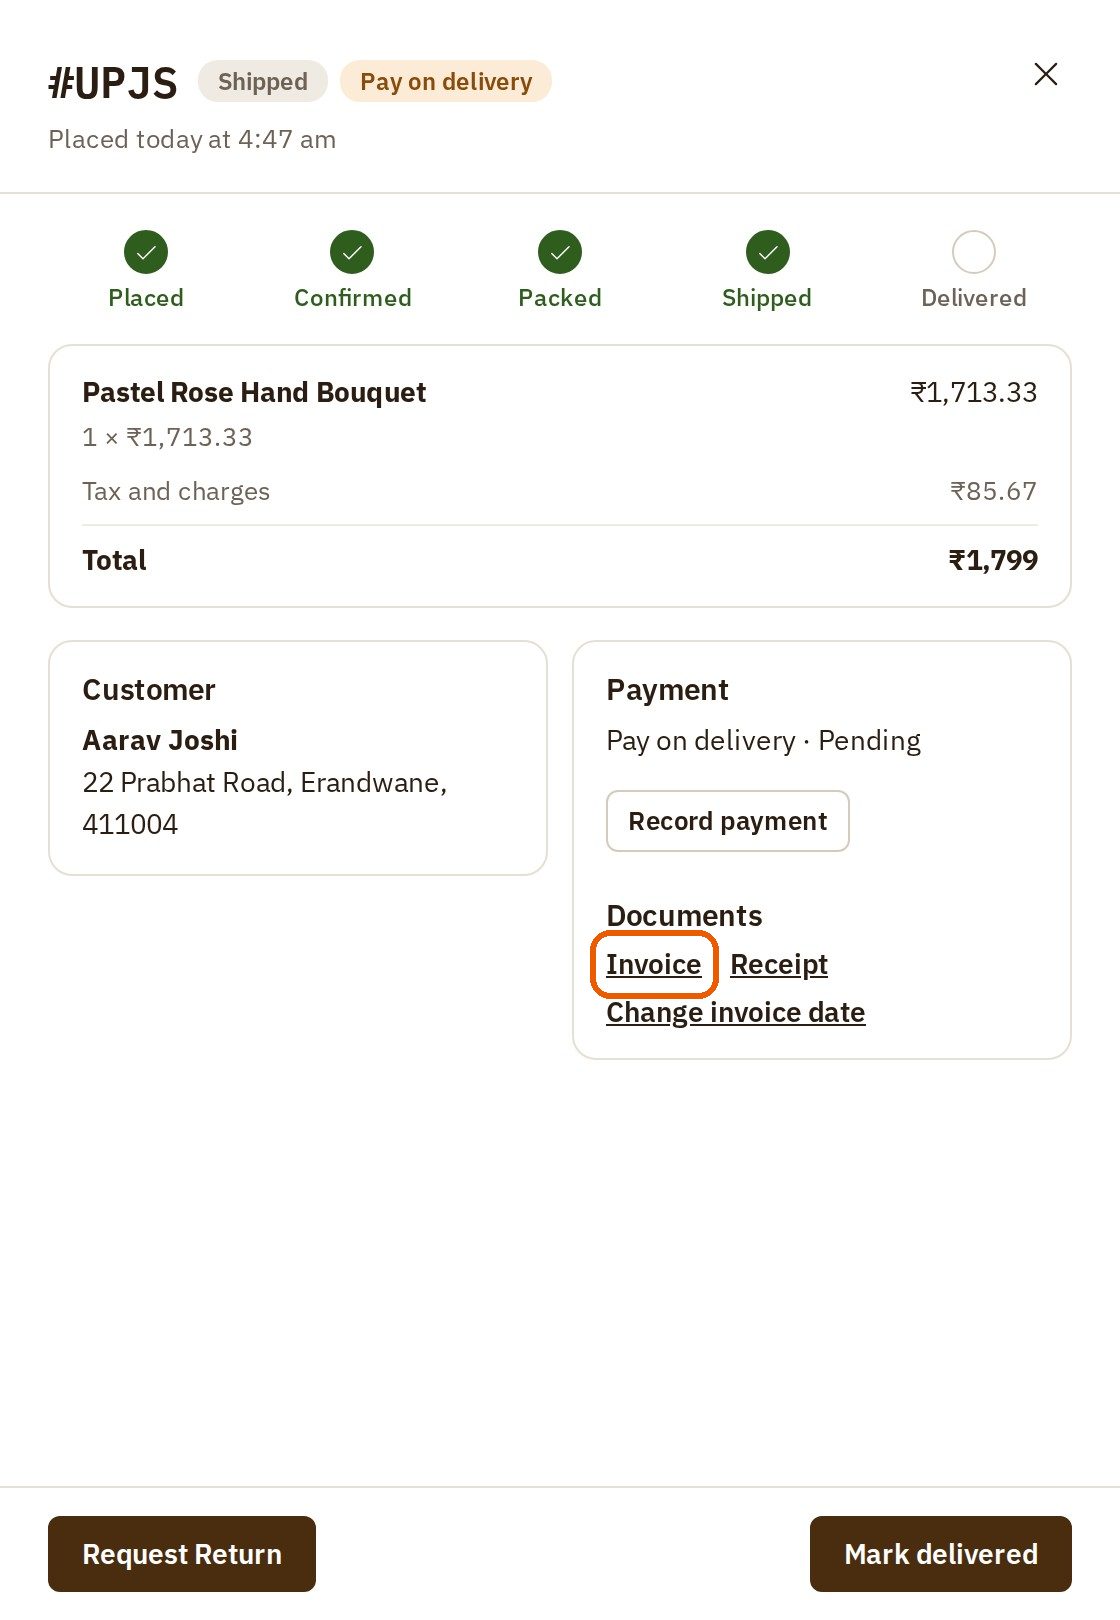
- When it leaves the studio, press Mark shipped. That is the moment Meera chose for the invoice.
- The invoice appears in the order under Documents. Press Invoice to open it.
The invoice shows your legal name and address, your own invoice number, the product's HSN code and GST rate, and the GST worked out from that rate.
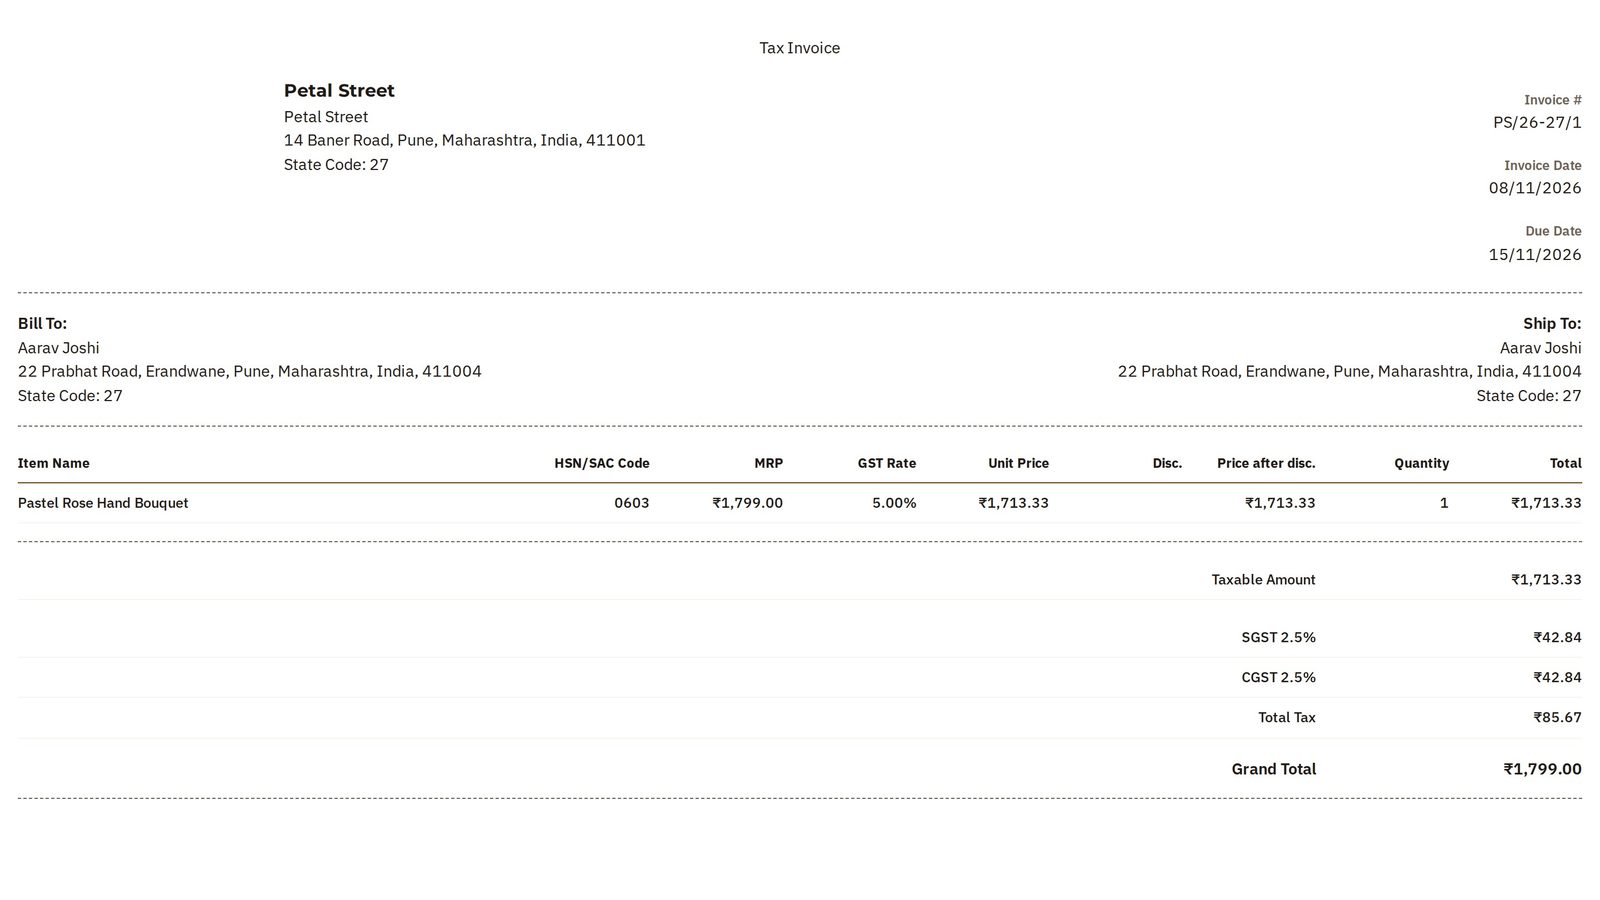
From now on, every order gets one of these.
Was this tutorial helpful?
‹ Previous
Choose or change your planIN THIS TUTORIAL
AI websites with native commerce. Pages, blog, store, payments and GST invoices in one place, built from a short description.
Start free for 14 days →© 2026 Opmiz · WriterBabu Online Services Private Limited. All rights reserved.
Prices in INR, before 18% GST · Made in Patna, India