YOU WILL LEARN
✓
Received, Expenses, After expenses
✓
To collect shows cash still owed
✓
Expenses need the Pro plan
How is the business actually doing? Opmiz answers in three numbers on one page: what came in, what went out, and what is left. Check it once a week, and you'll always know where you stand.
In the screenshots, Meera checks the numbers for Petal Street, a flower studio in Pune.
Three numbers
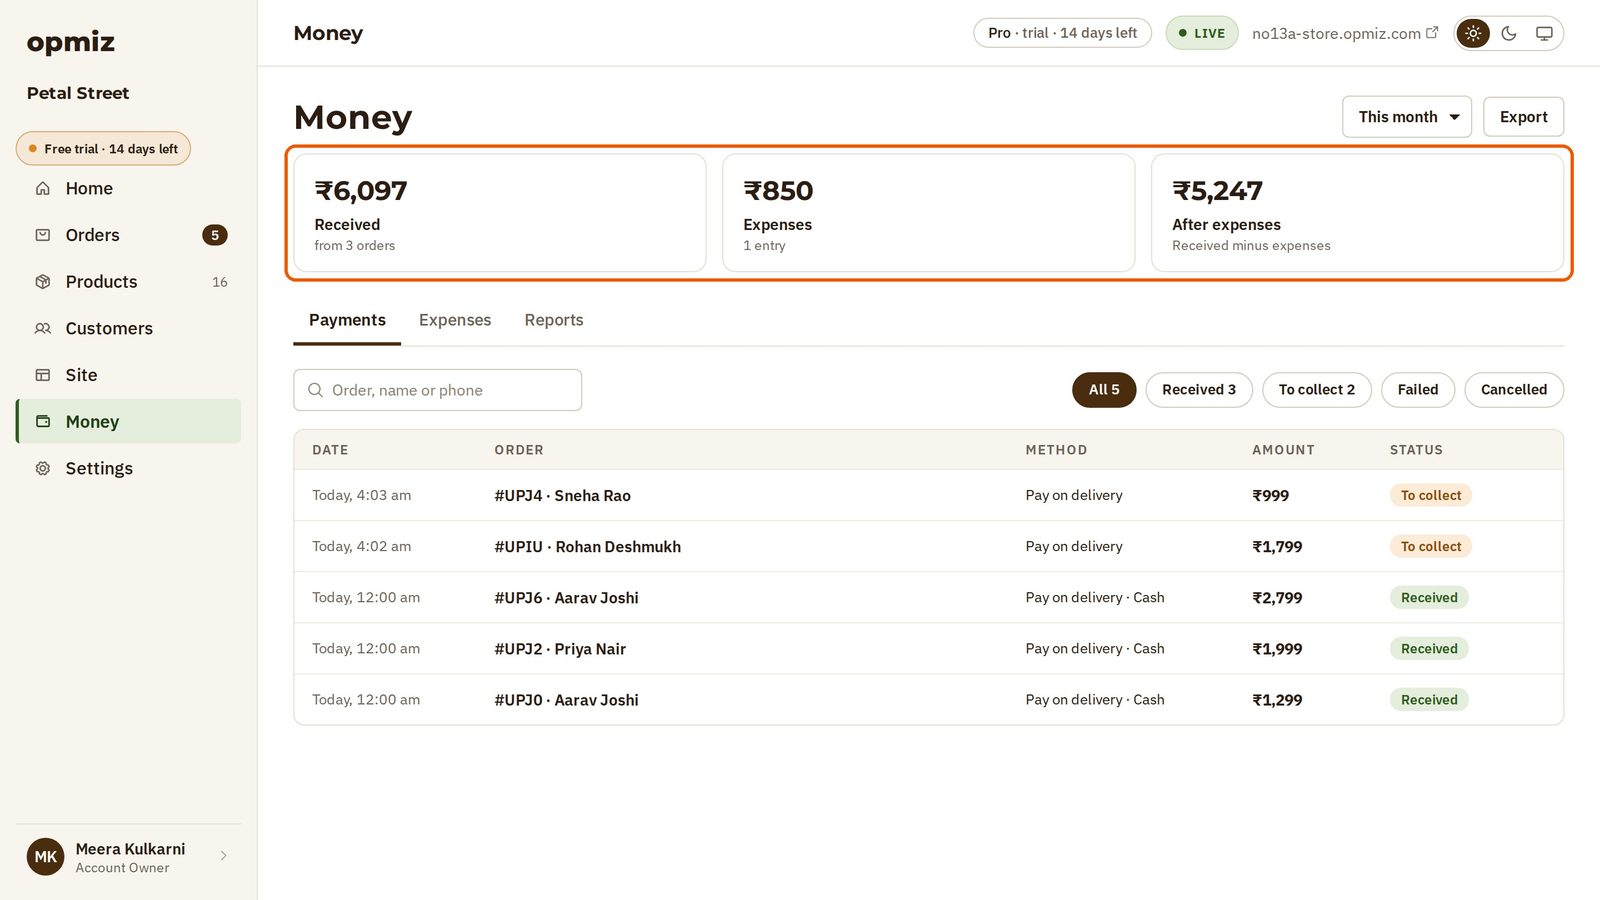
Open Money in the menu on the left. At the top are three numbers:
- Received: the money that has actually reached you this month, and how many orders it came from.
- Expenses: what you have recorded spending.
- After expenses: Received minus Expenses. That's the number most people come here for.
Money you still have to collect
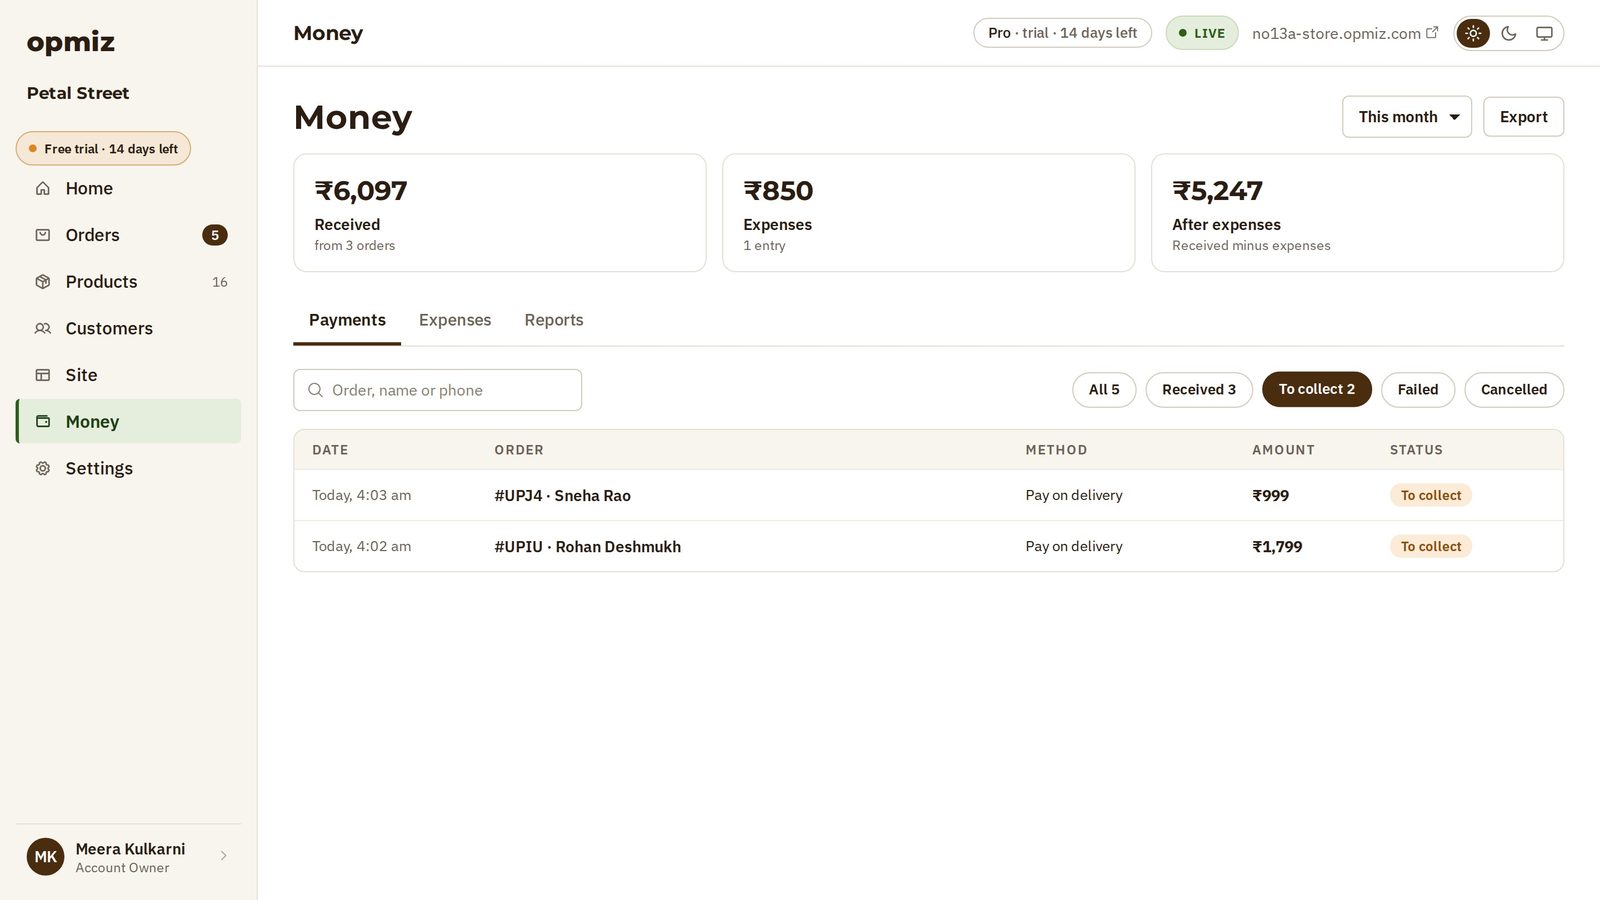
Below the numbers, under Payments, is every payment.
Orders on Pay on delivery aren't money yet, so they aren't counted as received. Press To collect to see only those. When you collect the cash and record it on the order, it moves up into Received.
Choose the period
All of this is for the month so far. The This month menu at the top right lets you look at last month, this year or all time instead.
In the video, Petal Street only opened this month, so last month is empty.
Add an expense
Keeping track of what you spend needs the Pro plan, and the demo business is on it. On Starter, the Expenses tab has a Pro label.
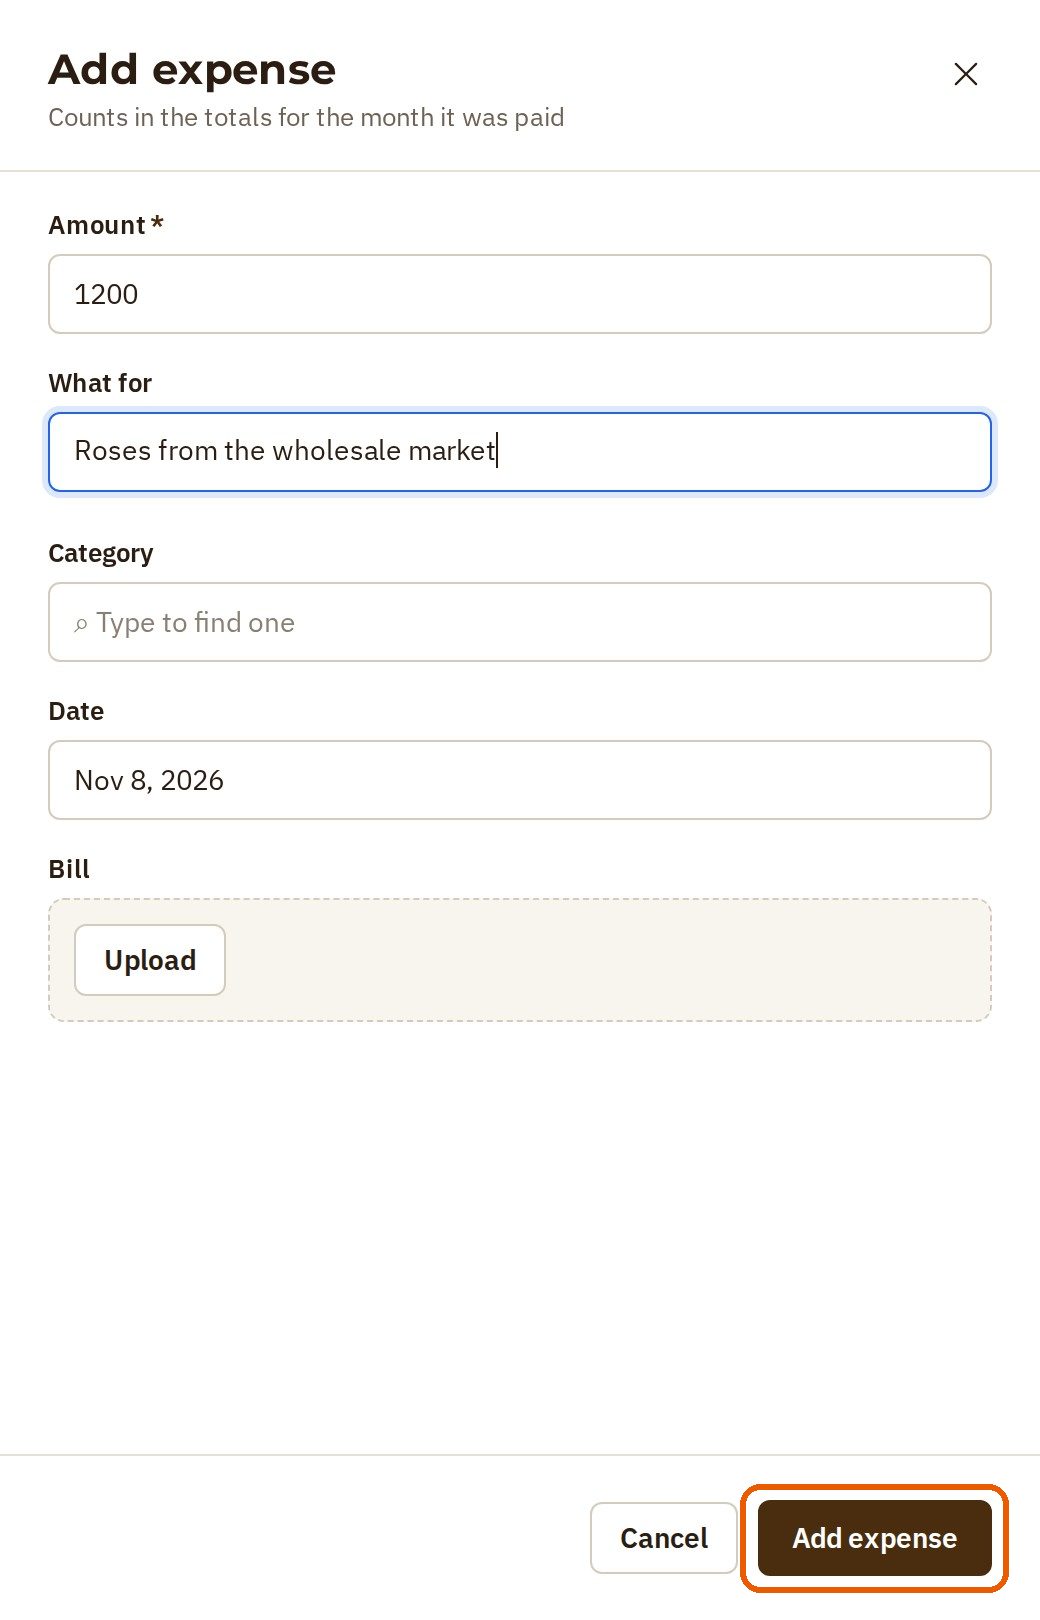
- Open the Expenses tab and press + Add expense.
- Amount: the box starts with a zero. Select it all first, then type the amount.
- What for: what the money was spent on. Meera has just bought roses from the wholesale market.
- Bill: you can attach the bill here too, with Upload.
- Press Add expense.
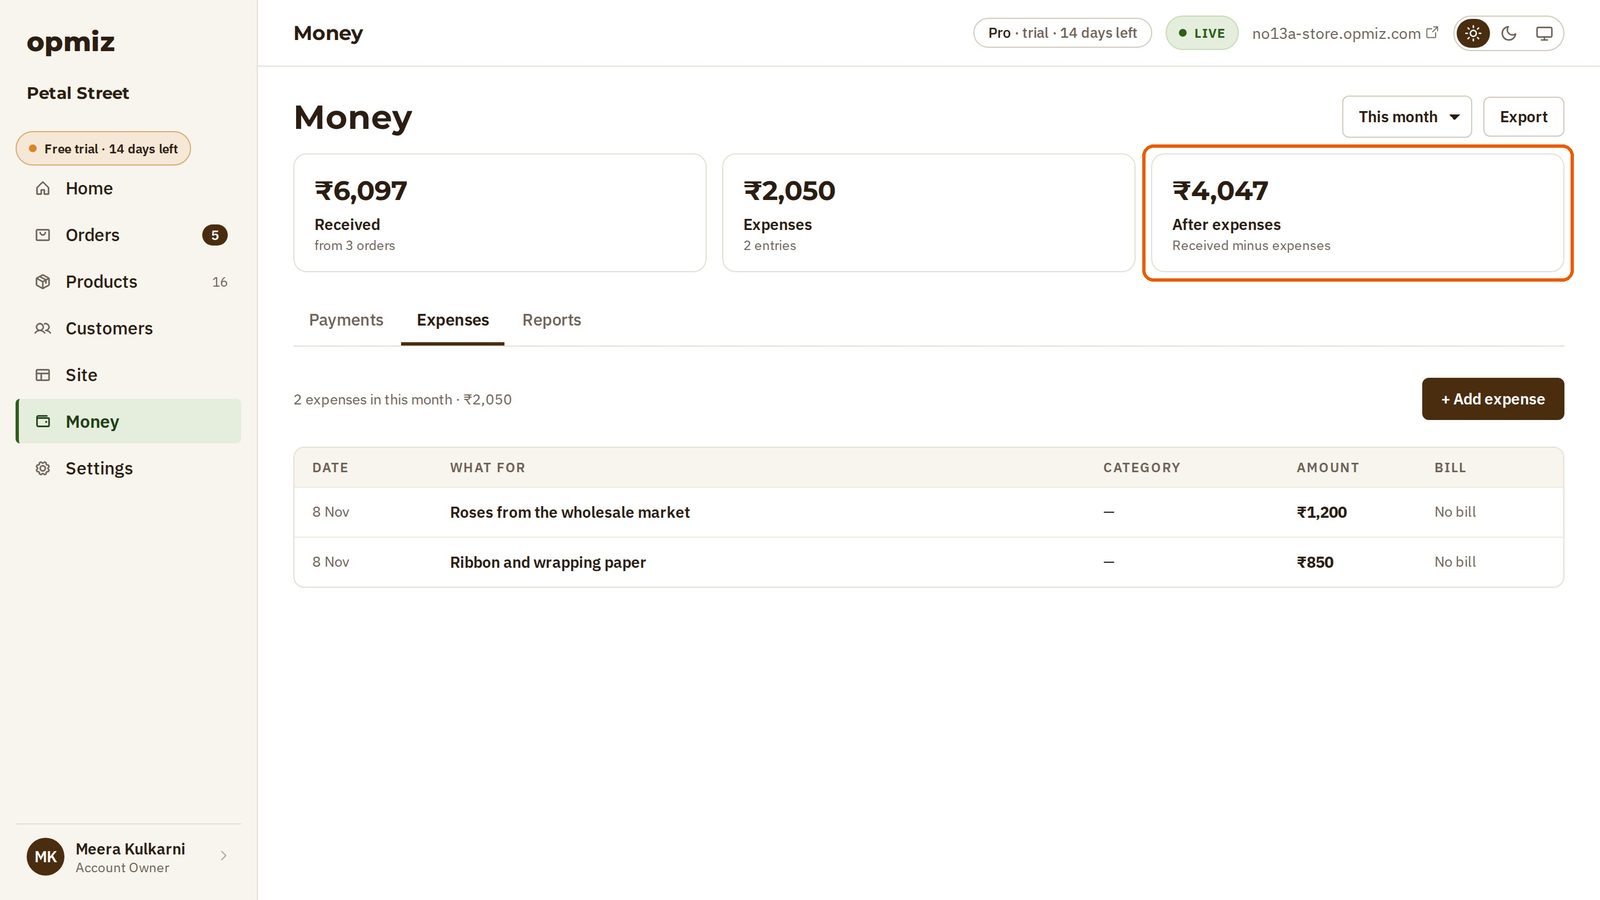
The numbers at the top change straight away. After expenses goes down by what you spent.
Was this tutorial helpful?
AI websites with native commerce. Pages, blog, store, payments and GST invoices in one place, built from a short description.
Start free for 14 days →© 2026 Opmiz · WriterBabu Online Services Private Limited. All rights reserved.
Prices in INR, before 18% GST · Made in Patna, India