YOU WILL LEARN
✓
Choose your gateway in Getting paid
✓
Add your keys, and keep them private
✓
Online orders arrive marked as paid
Many customers would rather pay online than in cash. Opmiz lets them pay by UPI, card, netbanking or wallet through your own payment gateway account. Once it is connected, online orders reach you already paid and confirmed.
In the screenshots, Petal Street, a flower studio in Pune, connects its PayU account.
Choose your gateway
Online payments run through your own account with a payment gateway. That is the company that handles UPI, cards, netbanking and wallets for you.
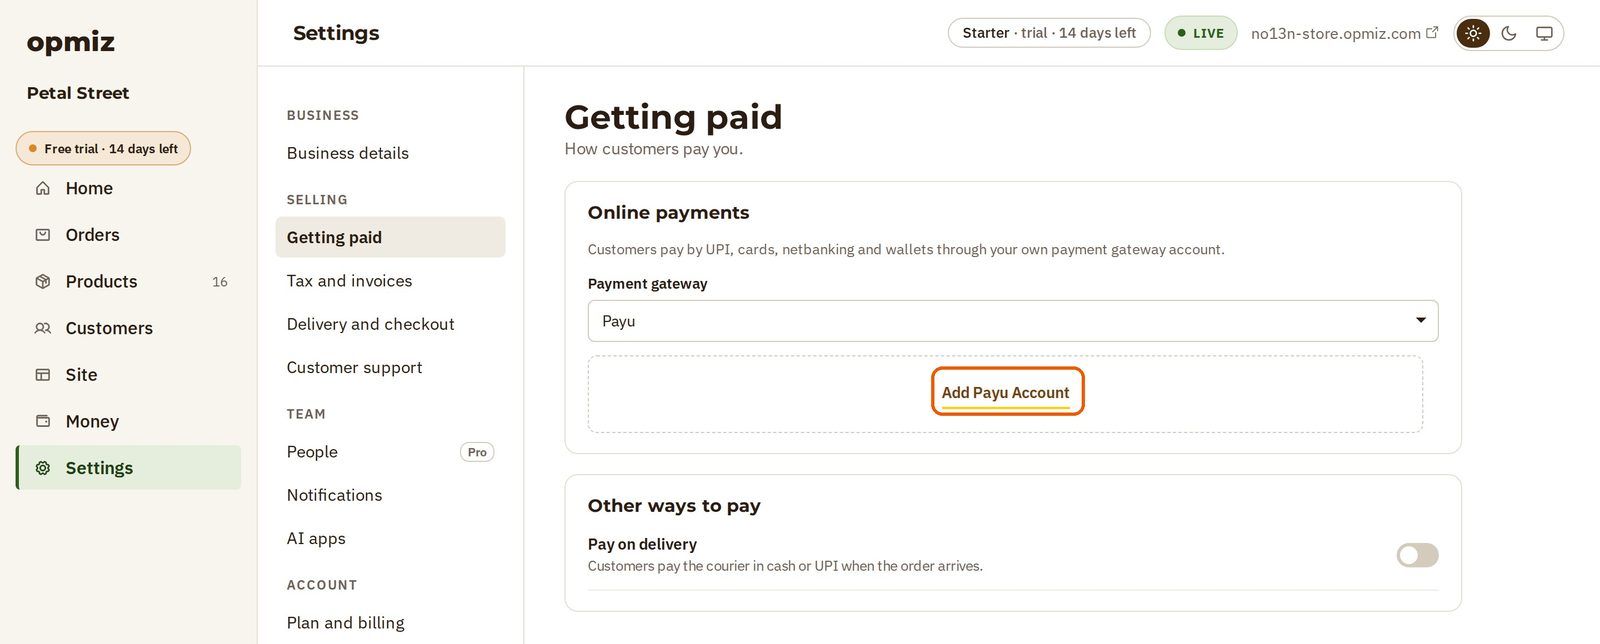
- Open Settings, then Getting paid.
- Under Online payments, pick your gateway from the Payment gateway list. Petal Street uses PayU.
- Press Add Payu Account to add your account.
Add your keys
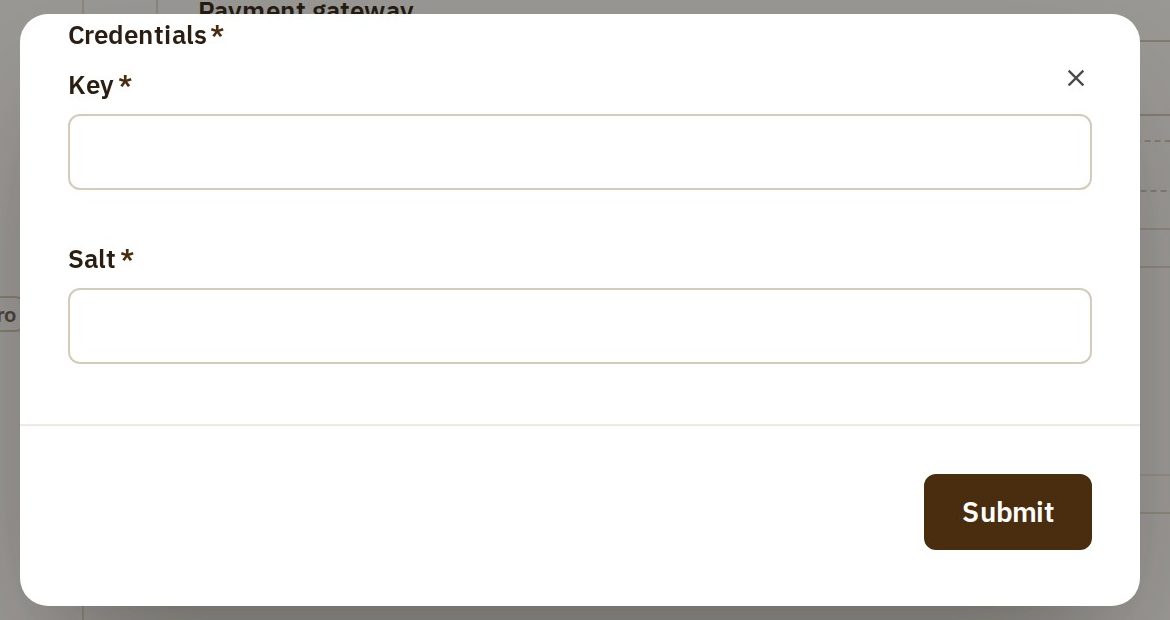
Opmiz asks for two values: a Key and a Salt. They come from your account with the gateway, so you will find them there.
Treat them like a password. Don't share them with anyone, and don't show them on screen. That is why the video leaves its own keys out: the demo business uses made-up keys, saved beforehand out of view. You enter your real ones, from your own gateway account.
- Copy the key and the salt from your gateway account.
- Paste them into Key and Salt.
- Press Submit.
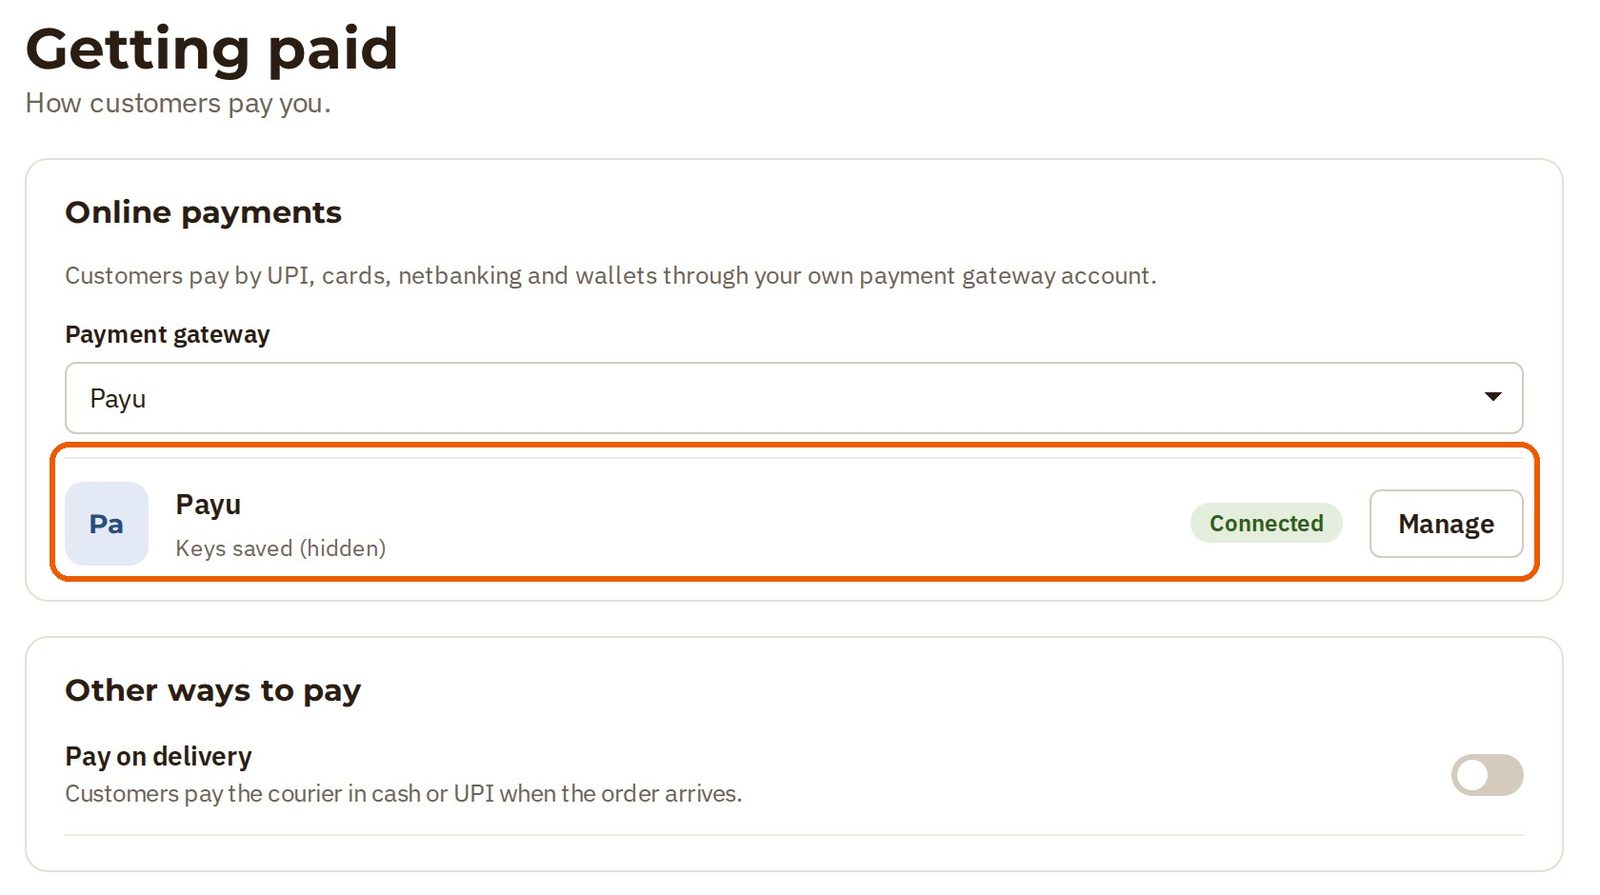
Your gateway is now marked Connected, and the page says Keys saved (hidden). If you ever need to replace your keys, press Manage on the same row.
Your shoppers can now choose to pay online.
What your shopper sees
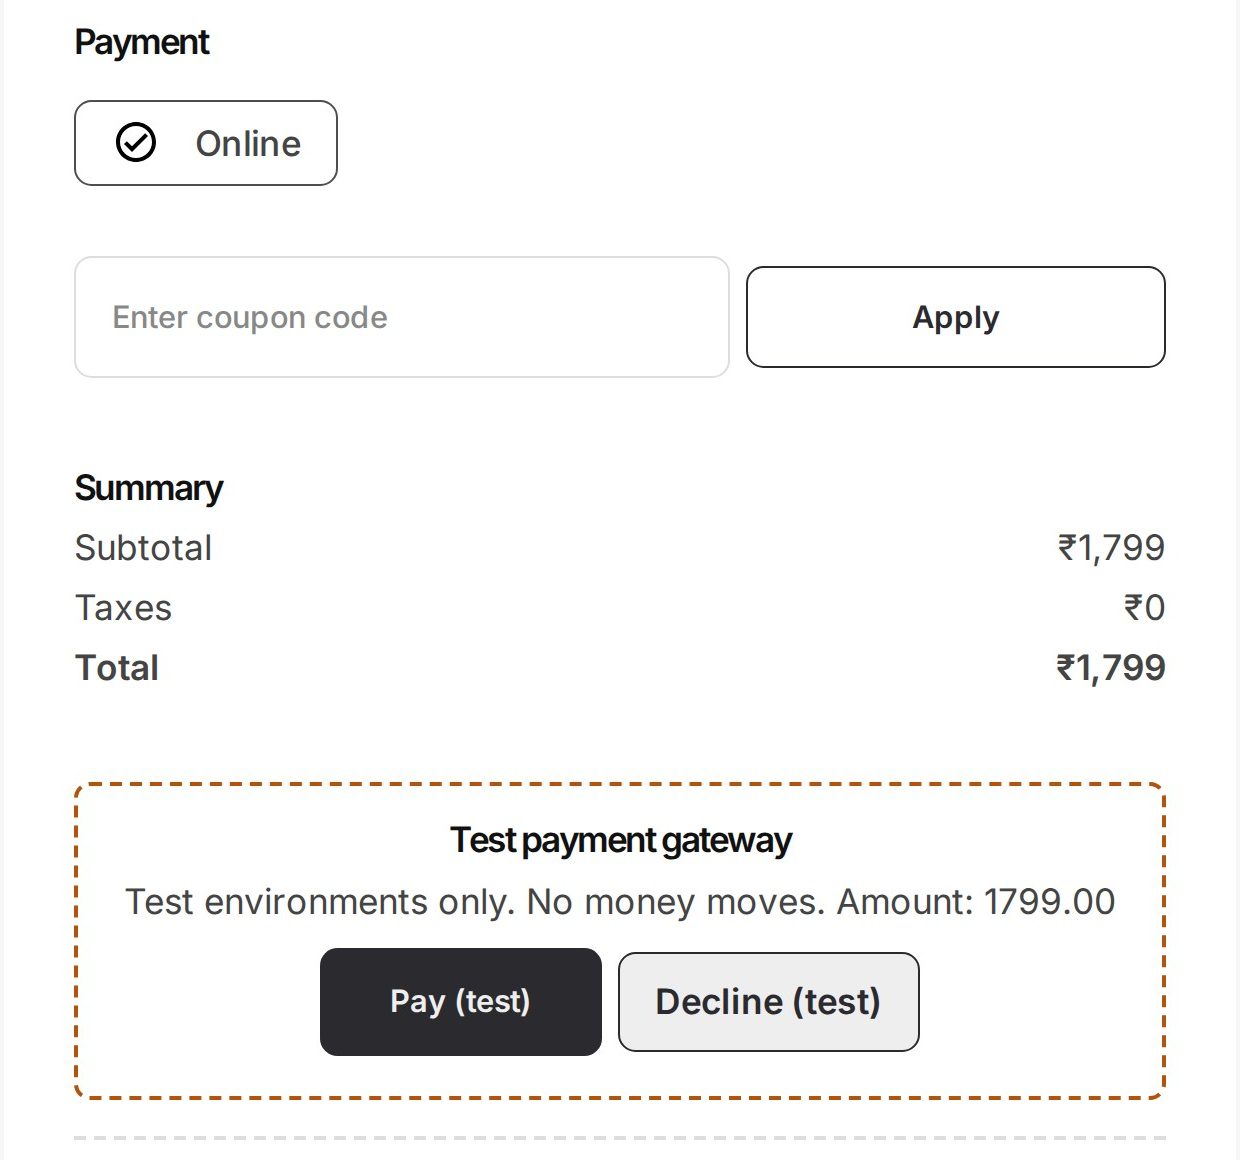
At checkout, the shopper chooses Online under Payment. The button to place the order shows exactly how much they are about to pay.
Next, the shopper normally goes to your gateway's own payment page, where they enter their UPI or card details.
In the video, a practice payment box stands in for that page, and no real money moves. It is labelled Test payment gateway, and the shopper presses Pay (test). Your shoppers see your gateway's own payment page in its place.
Once the payment is done, it comes back to your store and the order is placed. The shopper sees Payment verified and Order Successful!
The order, already paid
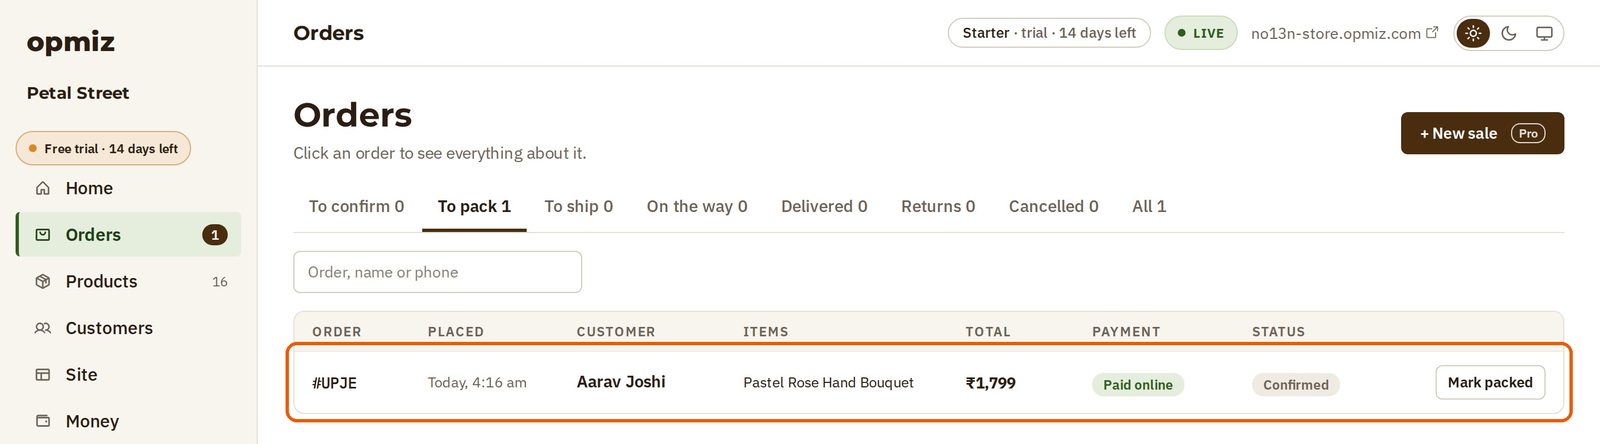
On your Orders page, the new order is marked Paid online. It is already confirmed, so it waits under To pack and you can go straight to packing.
Before you go live, place one small order yourself, with your real account, to see the money arrive.
Was this tutorial helpful?
‹ Previous
Handle your first orderAI websites with native commerce. Pages, blog, store, payments and GST invoices in one place, built from a short description.
Start free for 14 days →© 2026 Opmiz · WriterBabu Online Services Private Limited. All rights reserved.
Prices in INR, before 18% GST · Made in Patna, India